 30 days is over...
Feels like yesterday when I received an email from Royal Selangor Pewter asking me to join this challenge.
When I decided to say yes to the challenge, I was very apprehensive. Juggling work and my crazy hours is already a roller coaster ride hence throwing in a daily challenge for such a long period seemed like a crazy idea.
But I stubbornly decided I'll do it. Part of the reason wasn't the prize but more because it was for a good cause since cancer has touched so many of our lives affecting friends and close family. Even in that 30-day period, I saw a friend pass away from lung cancer after a battle of two years.
The 30 days was a roller coaster ride, some ups when the ideas work and of course, the downs when the jelly plops out in a sunken mess...
No matter how emotional it has been, the best thing is I had lots of fun. It gathered friends around me who gave ideas. Friends and blog readers would often ask too what is next encouraging me with kind words. And of course, the other half would nag me to death about what I am making. He was the big time keeper pushing me to move my butt to make jellies.
The pressure kinda mounted for this last jelly...people asked me am I doing a big thing for this finale.
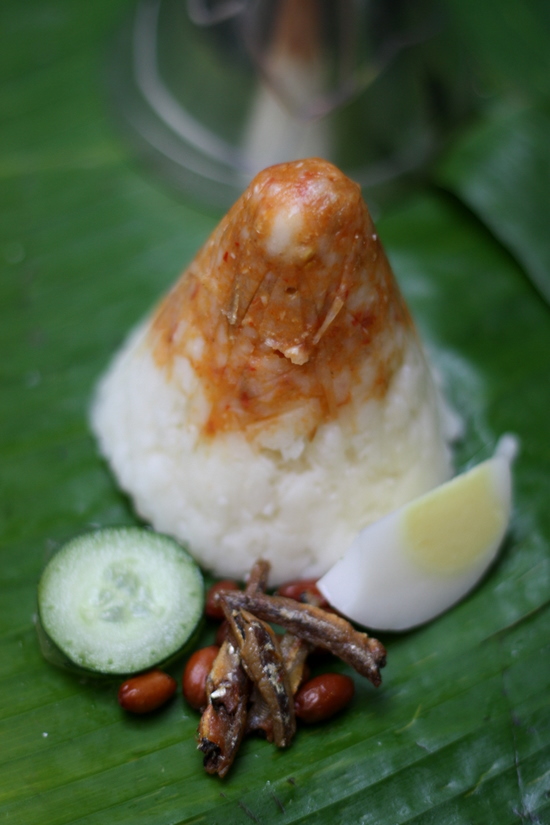
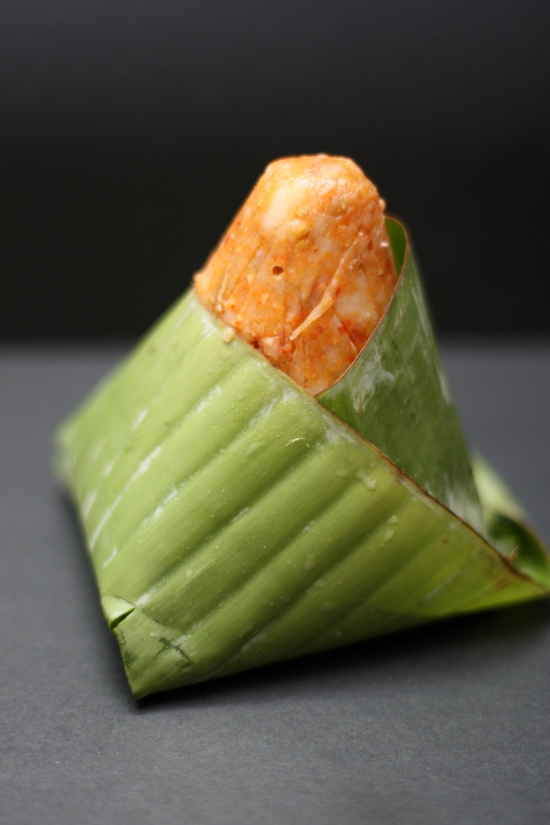
I decided to do a version of nasi lemak, Malaysia's favourite dish that they must eat every morning or night. When I meant a version, this wasn't just rice and sambal. Instead, this version held a few surprises. It is loosely based on a version I saw a certain famous chef make once for his television show. Once it airs, I will reveal more about him and the show.
Like everything in life, when I make the jelly things change. I had envisioned a smooth fluffy coconut base similar in texture like the one I had made for my root beer float. BUT when I combined hot gelatine liquid with the coconut gelato, it gelled up into small bits that strange enough looked like rice. I added sambal tumis to the tip just like how they do the real stuff.
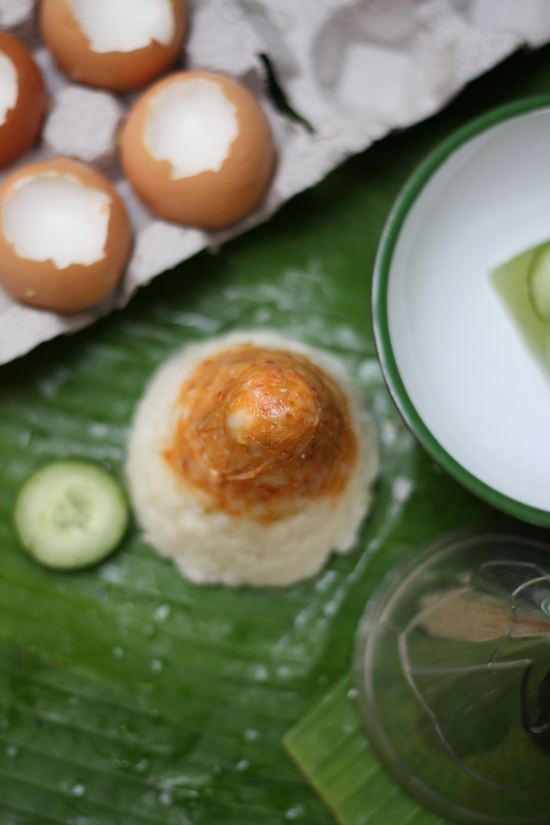
After that it was chucked in the freezer and left for a few hours. The the truth came...the unveiling and it plopped out nicely. Next came the whole assembling, like how to wrap a nasi lemak bungkus (packet in Malay). Luckily there were youtube videos giving tips so that was tackled.
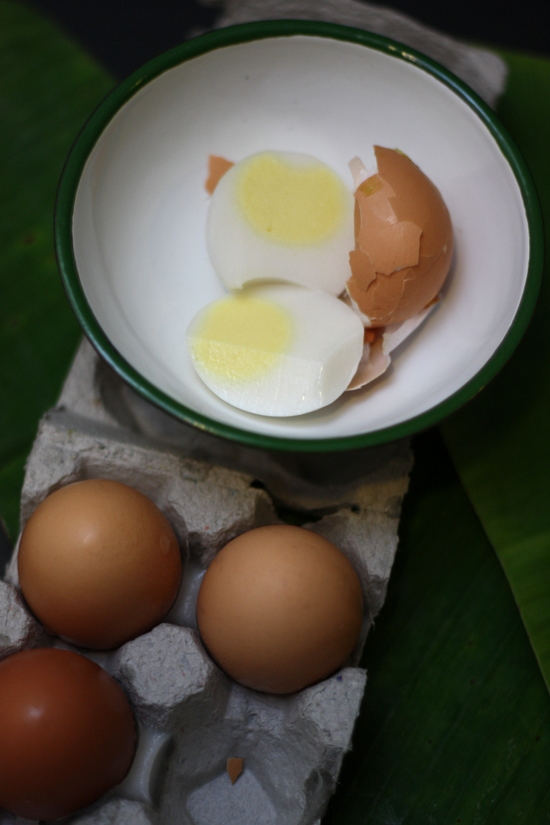
I had also made jelly eggs, as a play of the hard boiled eggs that usually go with it. But the peanuts and fried anchovies (ikan bilis) was kept true to the whole dish. Even cucumbers left over from yesterday's jelly was used, encased in a wobbly cucumber jelly.
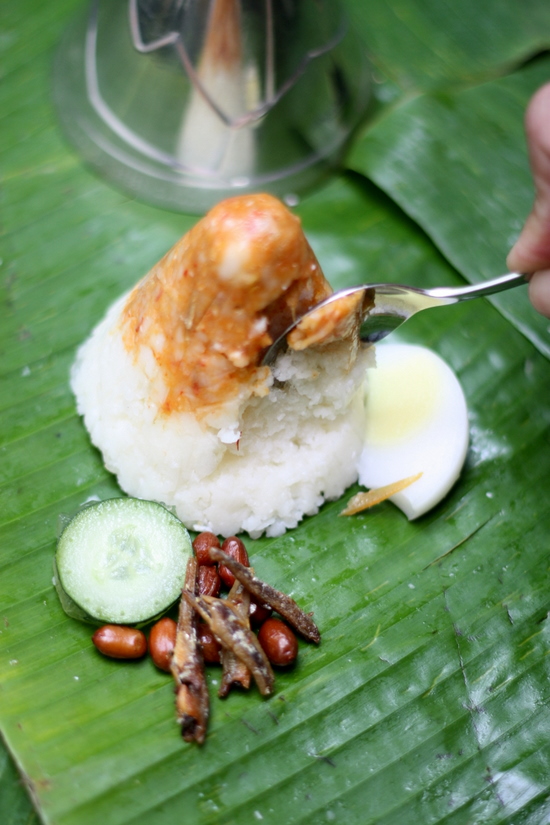
The verdict...it was rather nice indeed and that was for dinner. A definitely unique way to eat nasi lemak cold instead of piping hot but the sambal had a mellow spicy taste that rounded up the sweet coconut flavours.
Do give it a try and experience it yourself. Even though the October is almost over, there's still time to hurry over and support the cause by buying a Royal Selangor Nick Munro pewter mould as all proceeds go to breast cancer welfare association at the Royal Selangor website. For more pictures, see the Flickr set for all the whole Royal Selangor Jellyriffic challenge.
"Nasi Lemak Bungkus"
nasi lemak
4 1/2 teaspoons gelatine powder
2 tablespoons hot water
150g coconut gelato
4 tablespoons sambal tumis
jelly eggs
yolk
50ml coconut milk
50ml water
3 tablespoons caster sugar
2 1/2 teaspoons agar agar powder
drop of yellow colour
egg white
100ml coconut milk
100ml water
40g caster sugar
5 teaspoons agar agar powder
cucumber jelly
1/2 cucumber, cut into slices
50ml cucumber juice
1/3 tablespoon gelatine powder
fried peanuts
fried ikan bilis (anchovies)
To make nasi lemak: Bloom gelatine powder. Melt with hot water. Mix hot gelatine powder with cold coconut gelato. It will fluff up and cause it to gell into small bits similar to cooked egg white. Take a few tablespoons out and mix with sambal. Line the moulds like cling film. Top with sambal mixture. Compress coconut mixture on top. Freeze to set.
To make jelly eggs: Make the yolk by combining coconut milk, sugar and agar agar powder together in a pot. Heat over low heat until it is combined and thick. Remove. Add food colouring to look like the yolk. Pour into round moulds. Leave to cool. Set in a fridge. For the egg shells, crack the top and remove the eggshells and pour out the egg. Wash and dry out. Make the egg white section by combining the coconut milk, sugar and agar agar powder together over a low heat. Once it thickens, remove and pour into a jug. Pour a little in the egg shell. Add egg yolk. Cover with remaining egg white mixture. Continue for rest of eggs. Chill in the fridge for few hours till set.
To make cucumber jelly: Bloom gelatine powder. Add 1 tablespoon hot water to melt. Combine with cucumber juice. Pour into a flat mould. Top with cucumber slices.
To assemble: Remove nasi lemak from mould. Place on banana leaf. Crack jelly eggs and cut a slice out. Cut out cucumber. Serve with fried peanuts and ikan bilis.
 Remember the camera giveaway, well we have a winner....aka the Ravenous Rabbit.
She came up with this interesting combination of the famous Shanghainese drunken chicken with cucumbers to give it a crunchy texture, which I recreated for today's post....
Congratulations to her creation as it is a rather creative one that she insisted must have the crunchy cucumbers for texture.
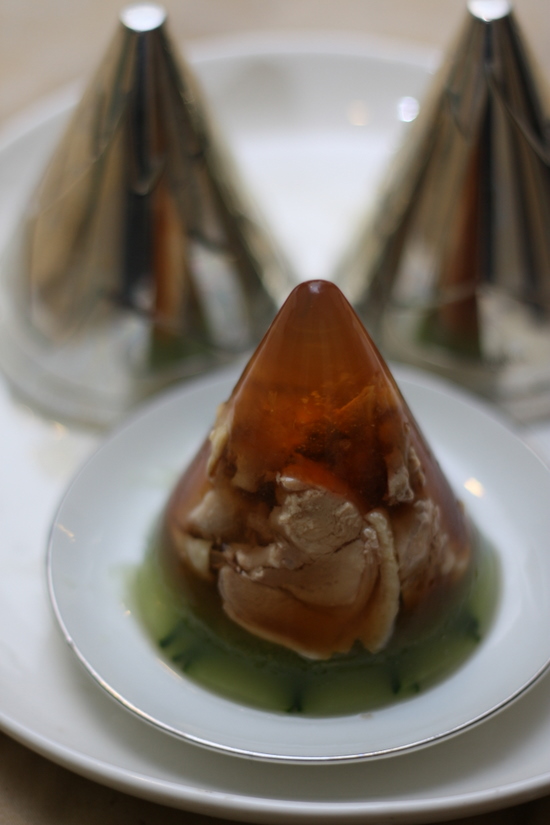
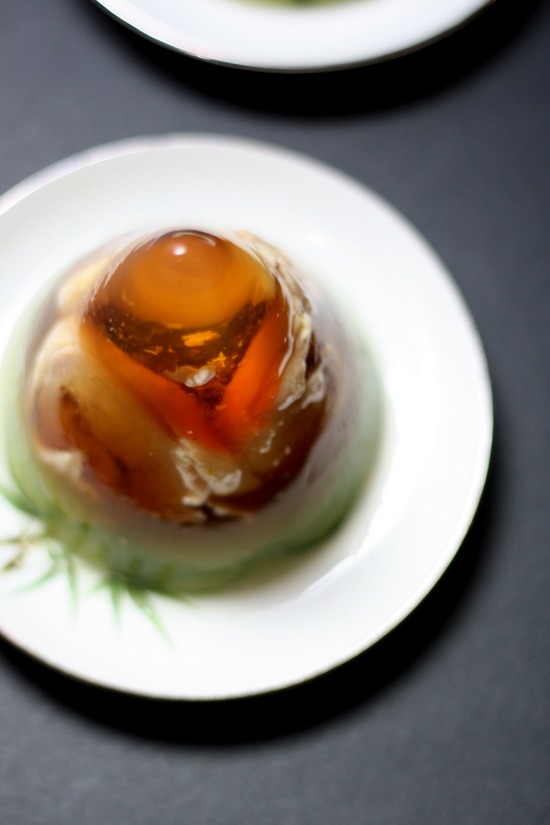
In this classic dish, the sweet amber tones of the Shao Xing rice wine pair beautifully with the chicken, which has taken a form of a roulade.
Originally I had intended for it to be circles - chicken followed by cucumber but the size of the mould didn't let me do that. Of course as Murphy works his law, even the chicken pieces didn't stick to the mould and floated a little away.
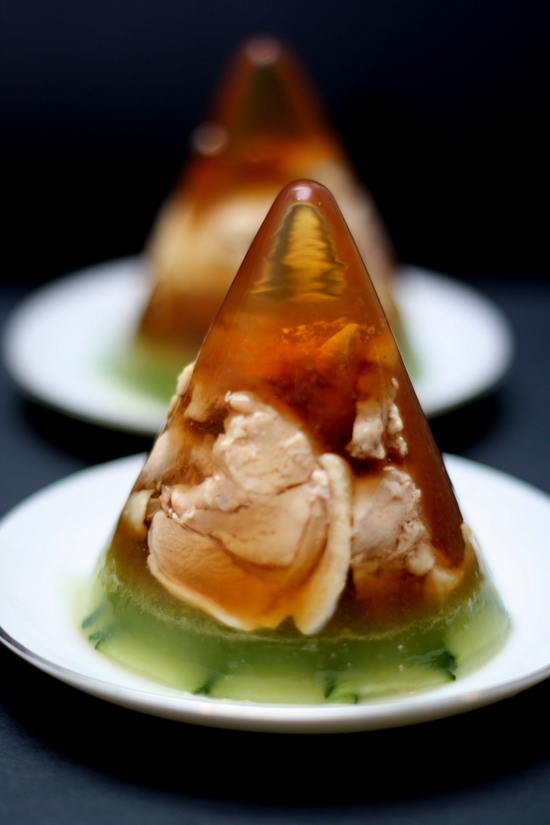
Despite those little hiccups, I am still very pleased with the texture, taste and whole look of the jelly.
The jelly has a rather more-ish appeal especially when eaten cold as the Shao Xing wine adds a sweet taste to the chicken.
I reckon this will be the perfect appetizer for any meal to serve at home. Maybe the restaurants will start imitating the idea as I can imagine diners will be impressed.
Thanks again to all of you who contributed the ideas.
Chinese Shao Xing Wine Jelly with Chicken Roulade and Cucumber (Makes 2 moulds)
chicken roulade
1 whole chicken leg, deboned
wine layer
100ml Shao Xing rice wine
50ml chicken stock
1 tablespoon gelatine powder
cucumber layer
150ml cucumber juice
1 tablespoon gelatine powder
1/2 Japanese cucumber, cut into thin slices
To prepare roulade: Place a large piece of cling film on a flat surface. Place the deboned chicken leg on top of it with the skin down. Using the cling film, roll it into a cylinder shape. Tie the two ends tightly to form the roulade. Steam over high heat for 20 minutes. Remove and soak in ice cold water to cool. Once cooled, pour away the chicken stock to use in wine jelly and cut into pieces. Set aside.
To prepare wine layer: Bloom gelatine powder. Heat stock and wine gently in a pot. Add to bloomed gelatine powder; whisk to combine thoroughly. Pour two tablespoons into mould. Freeze for 15 minutes to set. Remove and place chicken roulade pieces on the side of mould. Pour wine jelly mixture to cover. Chill to set.
To prepare cucumber layer: Bloom gelatine powder. Add 1 tablespoon hot water to melt. Add to cucumber juice; whisk to combine. Place cucumber slices on top of wine layer. Pour cucumber jelly and chill for 5 hours till set.
Unmould and serve straightaway as a cold dish.
Reminder: Support the cause by buying a Royal Selangor Nick Munro pewter mould as all proceeds go to breast cancer welfare association. For more pictures, see the Flickr set for all the whole Royal Selangor Jellyriffic challenge. To view, all the jellies, see this link to the Royal Selangor website.
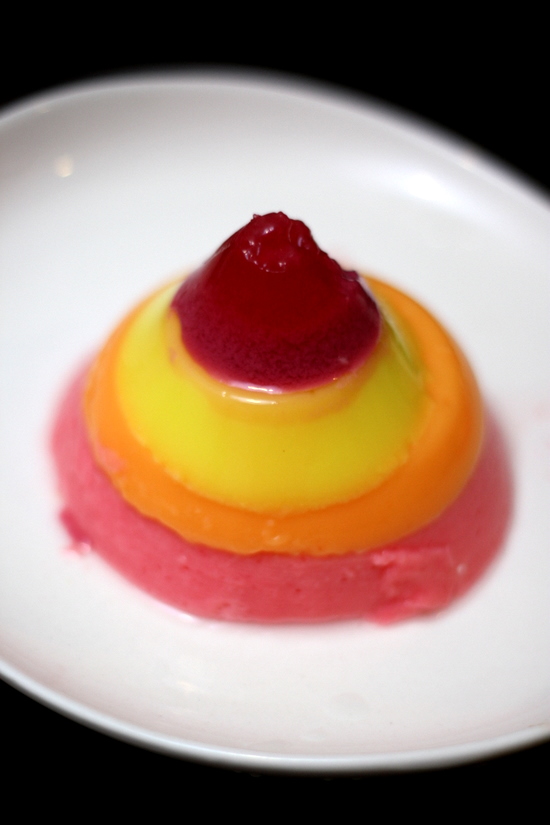
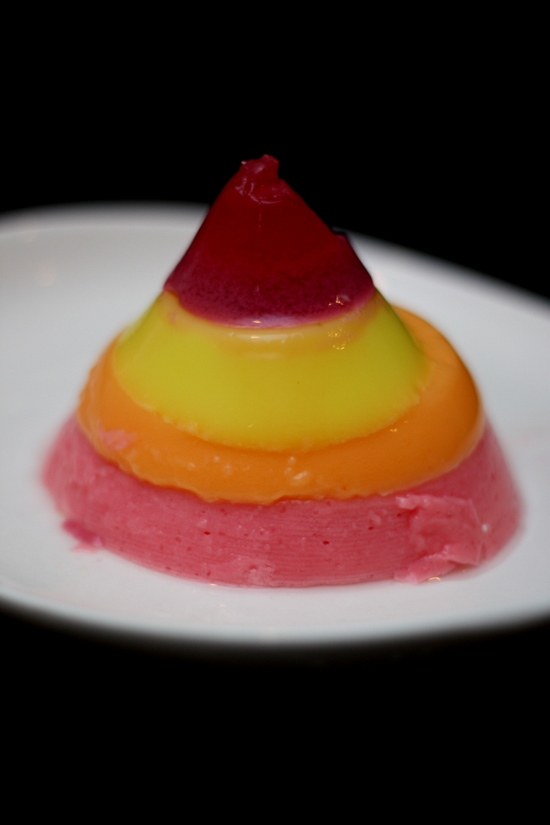
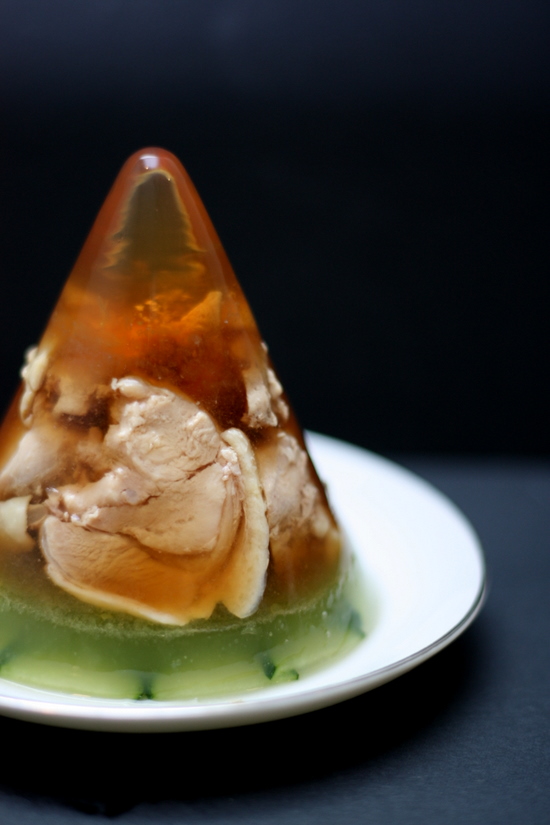
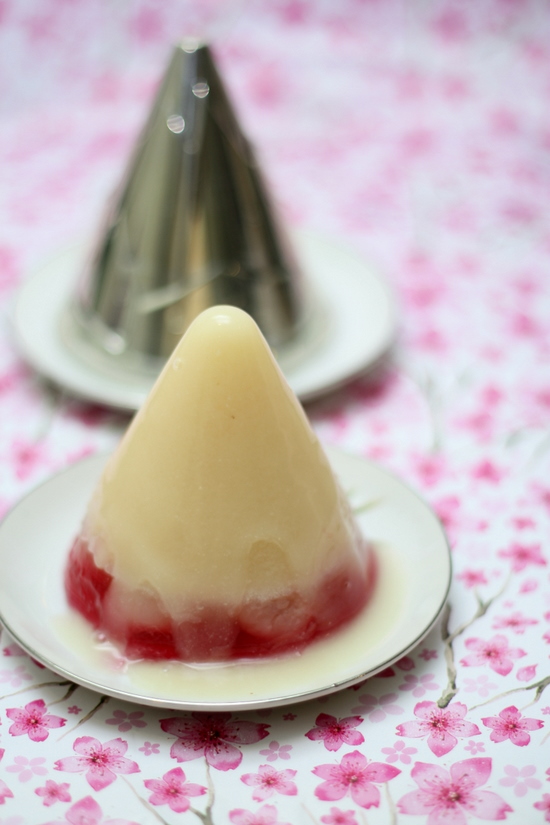
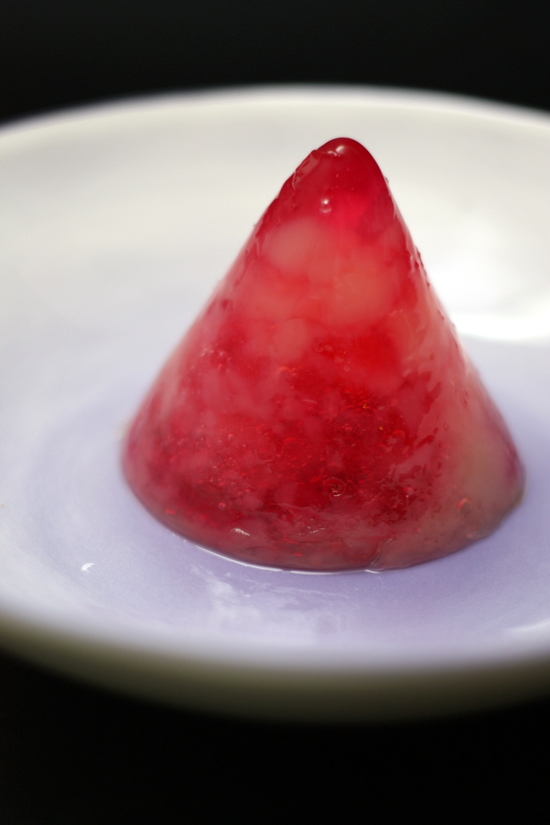
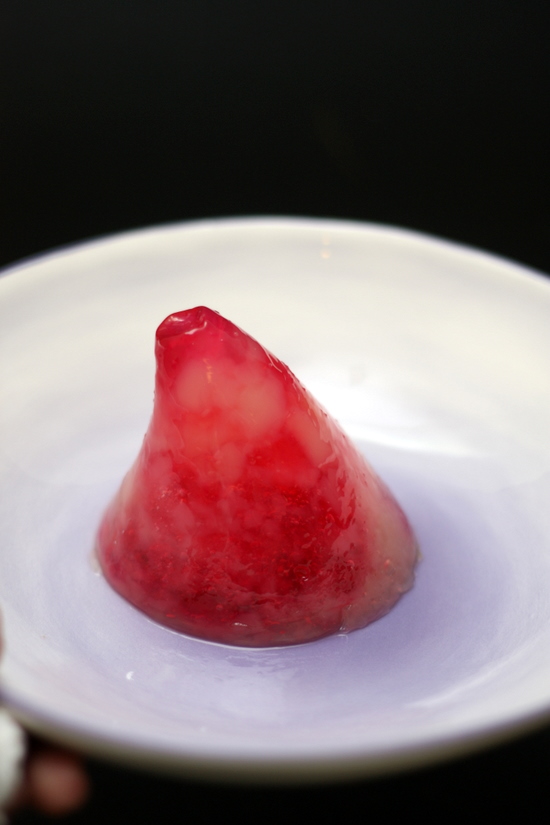
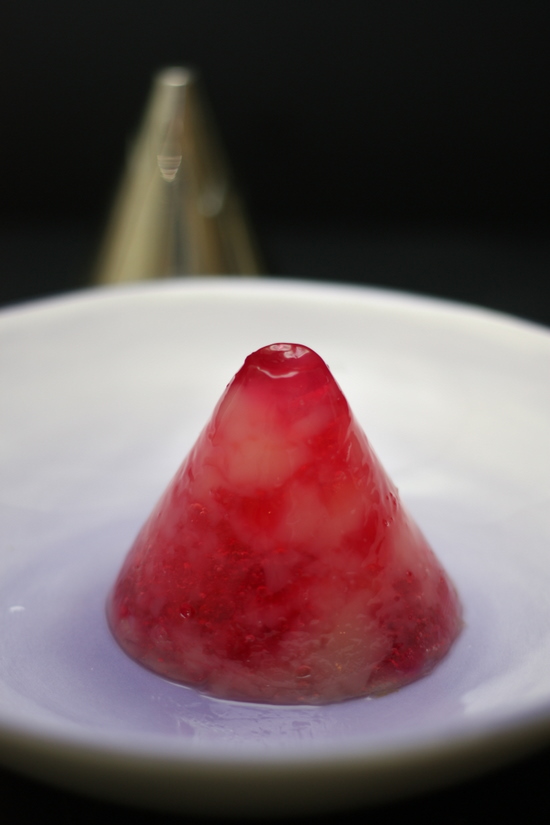
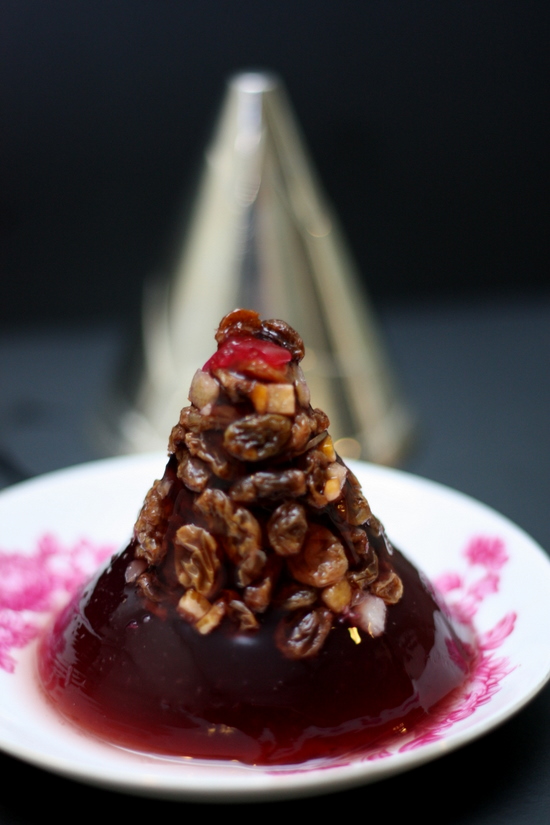
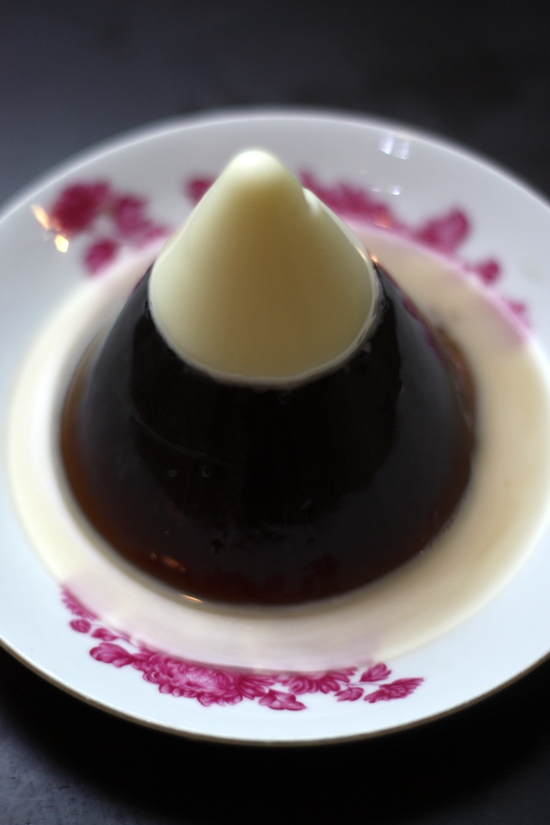
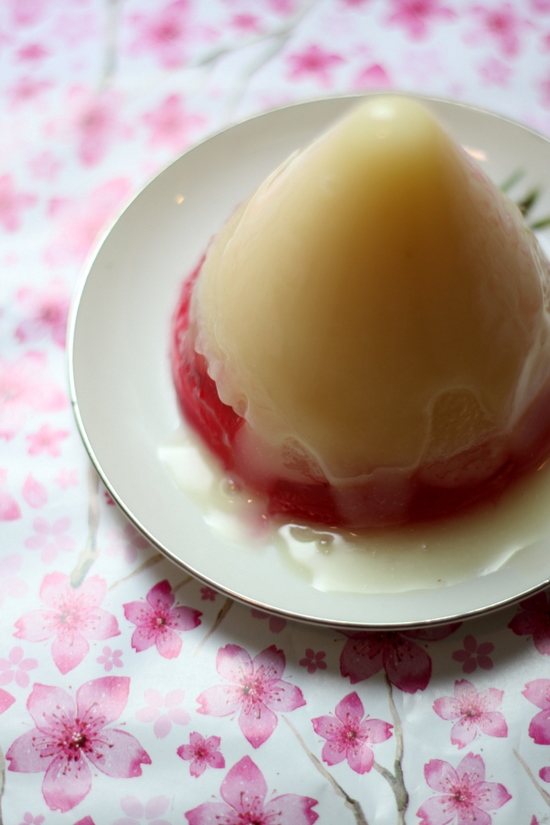 The failures really have shaken my confidence but I'm glad to say we're back on track, with a proud standing cone of Chinese almond, raspberry and longan jelly.
It's a rather simple one and an old fashioned one.
In fact, my mother was just talking about eating this on Monday.
Being of the older generation, she has fond memories of this as a dessert served in the good old days....like she describes it, cold almond jelly with canned longan and a red layer topped with ice cubes.
Rather than make it from scratch (soaking the Chinese almonds or apricot kernels, as they are actually called) I took the easy way out and employed the good services of one of my favourite restaurants aka Elegant Inn at Menara Hap Seng.
We were there for a wonderful lip smacking meal (geoduck sashimi, salted egg yolk crab, goose liver fried rice and etc) hence I packed back their Chinese almond dessert, a must whenever we dine here.
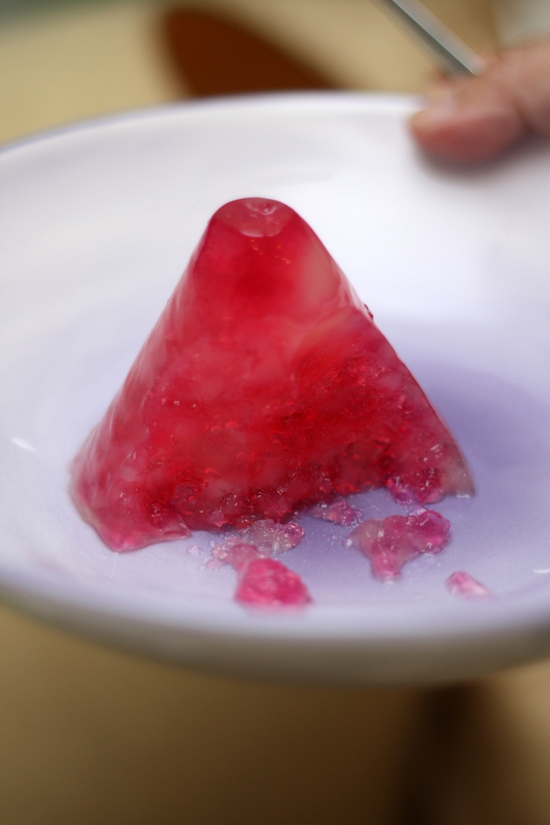
This was set with gelatine and the bottom layer was the raspberry jelly studded with longans.
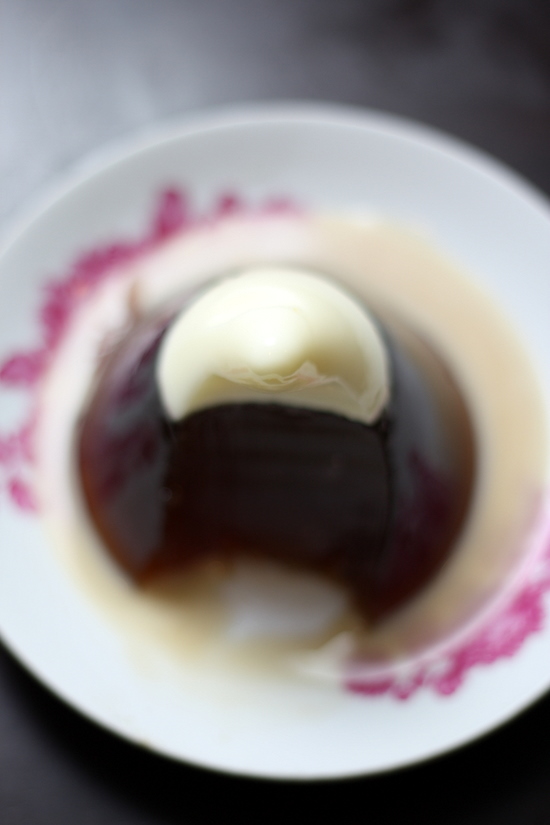
As I was trying to unmould the jelly, I ended up melting the sides that it had an attractive appearance with the trickling milk that reminds me a little of Christmas trifle.
It definitely does not look retro anymore. Hopefully mum will approve of this and that curse of mine has gone off forever.
Chinese Almond, Raspberry and Longan Jelly
150ml Chinese almond dessert
2 tablespoons raspberry jelly powder
4 tablespoons gelatine powder
100ml water
canned longans
Bloom 2 tablespoons gelatine powder in a little water. Combine with almond dessert in a small pot. Heat just below boiling point. Pour into mould. Leave to chill. Scrape the surface of jelly to allow next layer to set together. Place longans on top arranged in a circle. Melt jelly powder with half of the water that has been boiled. Mix and add remaining water. Cover the longans. Chill for 5 hours. Unmould by dipping it in hot air.
Reminder: Support the cause by buying a Royal Selangor Nick Munro pewter mould as all proceeds go to breast cancer welfare association. Also, do remember to submit your suggestions to booliciouskl@gmail.com or leave a comment for the mould to win the Olympus camera VG-110. For more pictures, see the Flickr set for all the whole Royal Selangor Jellyriffic challenge. To view, all the jellies, see this link to the Royal Selangor website.
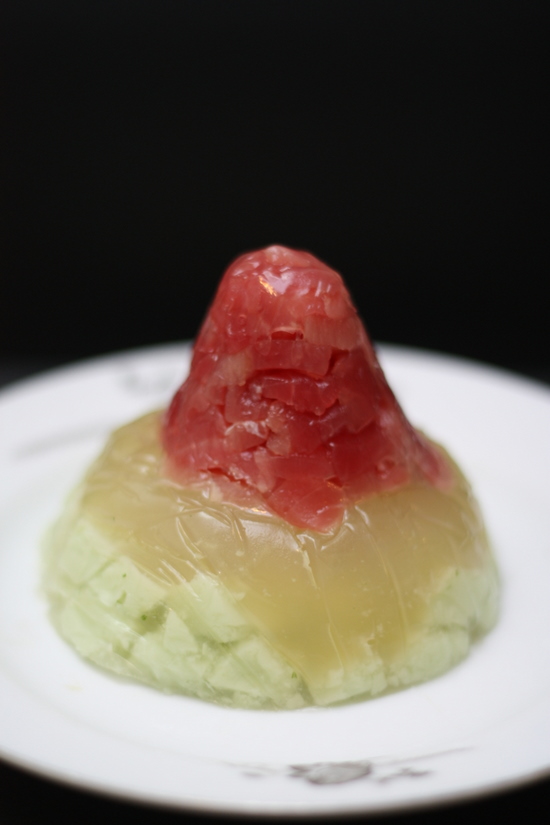 I am definitely not a great engineer as today's jelly effort is one that was sinking away...
I tend to leave things to the last minute when it hits mid-week since I don't have time to experiment much.
Hence you get structurally unsound jellies like this particular one.
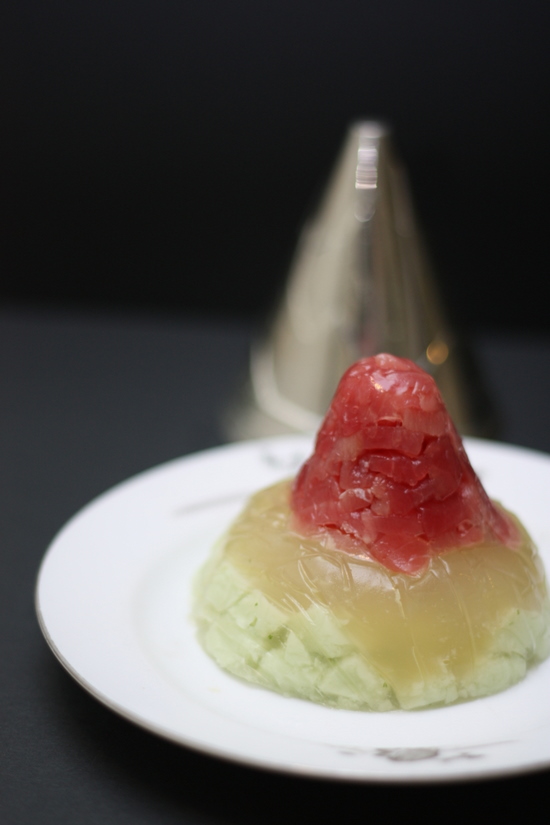
The top bit aka the tuna tartare was just too heavy for the soft just set jelly to support that when I unmoulded it, it shook like a Tower of Pisa.
Luckily it didn't topple down like London Bridge in the nursery rhyme but it wobbled tremendously whenever I moved it.
The whole flavour combination started from what to do with this yuzu juice I had bought and needed to contrast with the sharp citrus fruit.
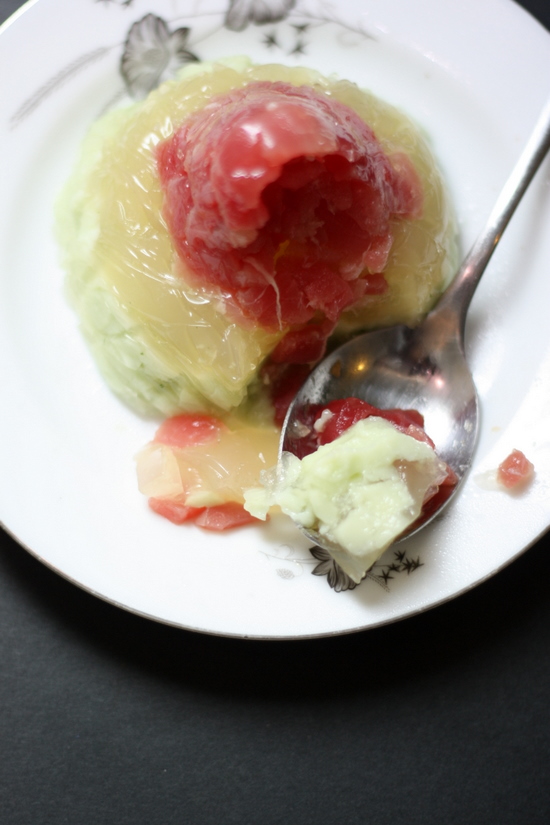
While the flavours were lovely on its own especially the very refreshing cucumber cream jelly, the whole combination didn't have a well rounded taste I was looking for.
I kinda suspect the sharp tang of yuzu was a little jarring with the cool cucumber and the textures of the tuna. Next time I reckon it is better without the yuzu since the cucumber cream jelly is a big winner in refreshness.
In the meantime, let me see when my Tower of Pisa will collapse or maybe like the real thing, it'll just keep tilting on one side.
Tuna Tartare, Yuzu and Cucumber Cream Jelly
50g tuna sashimi, cut into squares
yuzu layer
50ml yuzu juice
100ml water
2 tablespoons gelatine powder
cucumber layer
200ml cucumber juice
2 tablespoons cream
2 tablespoons gelatine powder
1 tablespoon gelatine powder
150ml water
To prepare yuzu layer: Bloom gelatine powder in water. Add a little hot water to melt. Mix yuzu juice and water together. Add gelatine mixture with it and pour into a tray. Chill for 2 hours to set. Cut into cubes.
To prepare cucumber layer: Bloom gelatine powder in water. Add a little hot water to melt. Combine with cucumber juice and cream. Pour into a tray. Chill for two hours to set. Cut into cubes.
To assemble: Line the mould with cling wrap. Pack tuna sashimi on top. Bloom gelatine powder in water. Add hot water to melt. Pour into a measuring jug. spoon a little at the bottom of tuna sashimi. Add yuzu cubes and pour jelly to bind. Add cucumber cubes and jelly to bind. Chill for 2 hours to set. Turn over and serve.
Reminder: Support the cause by buying a Royal Selangor Nick Munro pewter mould as all proceeds go to breast cancer welfare association. Also, do remember to submit your suggestions to booliciouskl@gmail.com or leave a comment for the mould to win the Olympus camera VG-110. For more pictures, see the Flickr set for all the whole Royal Selangor Jellyriffic challenge. To view, all the jellies, see this link to the Royal Selangor website.
 One of the things I love about this challenge has been learning the different ways to work with gelling agents.
Through some research and books, I discovered this interesting way to create clouds and bubbles within the jelly.
Relatively simple, you need to just make a variety of different coloured jelly, scrape them and combine them together with one jelly mixture.
For this particular first time effort, I had a three flavour combination - raspberry, white peach, and white wine.
The clear bits and the softer peach tones are slightly overpowered by the red raspberry colour but nevertheless, it is still rather pretty especially when it is sitting on my new handmade Bitossi bowl (I love the varying lavender shades of it).
Maybe one can go wild and add more colours but I can imagine it will look rather rojak after some time.
Raspberry White Peach and Wine Jelly (Makes three moulds)
100ml white wine
4 tablespoons gelatine powder
4 tablespoons Raspberry Jelly powder (I used the Aeroplane brand)
200ml hot water
100ml white peach juice
Get ready three individual bowls. Make the white wine jelly by combining 1 tablespoon of softened gelatine powder and a little hot water to melt. Sieve and pour into a bowl. Freeze for 15 minutes. For the raspberry jelly, melt jelly powder with 100ml hot water. Combine 1 tablespoon of softened gelatine powder. Sieve and pour into a bowl. Freeze for 15 minutes to set. Soften 1 tablespoon gelatine powder. Add 1 tablespoon hot water to melt. Add to white peach juice and whisk to combine. Sieve and pour into a bowl. Freeze for 15 minutes. Remove set jelly from freezer. Scrape each jelly with a fork. Mix together all three flavours. Make remaining jelly with 100ml water and 1 tablespoon softened gelatine powder. Put a little of the scraped jelly in the mould. Pour clear jelly mixture to bind. Add more scraped jelly and jelly mixture until it reaches the top of mould. Repeat for second mould. Chill for at least 5 hours. Unmould and serve immediately.
Reminder: Support the cause by buying a Royal Selangor Nick Munro pewter mould as all proceeds go to breast cancer welfare association. Also, do remember to submit your suggestions to booliciouskl@gmail.com or leave a comment for the mould to win the Olympus camera VG-110. For more pictures, see the Flickr set for all the whole Royal Selangor Jellyriffic challenge. To view, all the jellies, see this link to the Royal Selangor website.
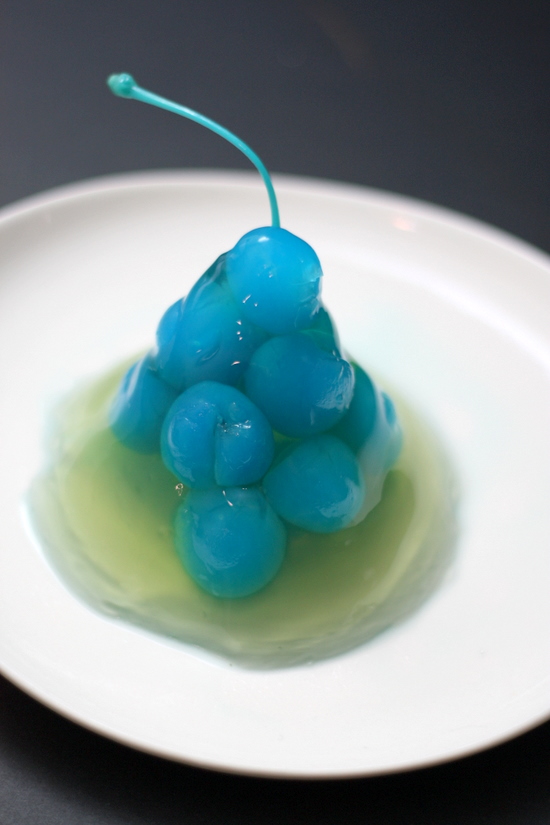 One of my wackiest ideas for this jelly competition is this particular entry, named after one famous blue tinged gal aka Smurfette.
Just like the ambiguous cartoon character she is named after (is she good or bad?), this particular sweetie is a little hard to decipher.
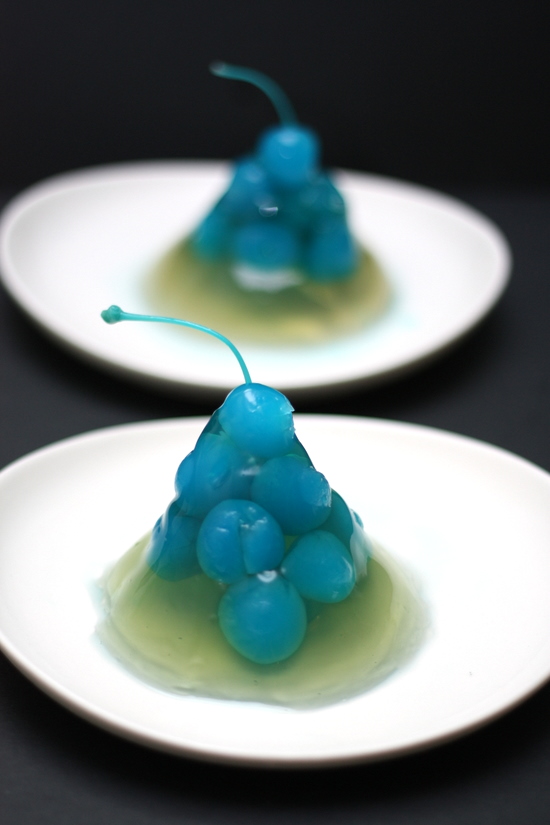
She may look a little weird with her blue colour (attributed by these interesting berry tinged cherries by Roland) but she actually tastes rather good.
I had paired her off with Thomas Kemper's vanilla cream soda which gives it a light pleasant vanilla taste that blends well with the sweet and slightly crunchy cherries.
.
My particular jelly was rather wobbly since I was actually short of time and only chilled it for two hours. Maybe next time it should be a bit longer to give it a crunchier texture. Nevertheless, it has a rather soft texture that can be quite pleasant to slurp down.
Blue Cherry and Vanilla Cream Soda Jelly (Makes two)
1 bottle of Roland blue cherries, drained and stalks removed except for two cherries
1 bottle of Thomas Kemper vanilla cream soda
2 tablespoons gelatine powder
Soften gelatine powder in water. Leave to bloom. Add a little hot water to melt. Once melted, add vanilla cream soda and whisk together. Place cherry with the stalk at bottom of the mould. Pour a little jelly mixture in the bottom. Divide the cherries among the two moulds. Top with remaining jelly mixture. Leave to chill for 2 hours or more. Unmould and serve immediately.
Reminder: Support the cause by buying a Royal Selangor Nick Munro pewter mould as all proceeds go to breast cancer welfare association. Also, do remember to submit your suggestions to booliciouskl@gmail.com or leave a comment for the mould to win the Olympus camera VG-110. For more pictures, see the Flickr set for all the whole Royal Selangor Jellyriffic challenge. To view, all the jellies, see this link to the Royal Selangor website.
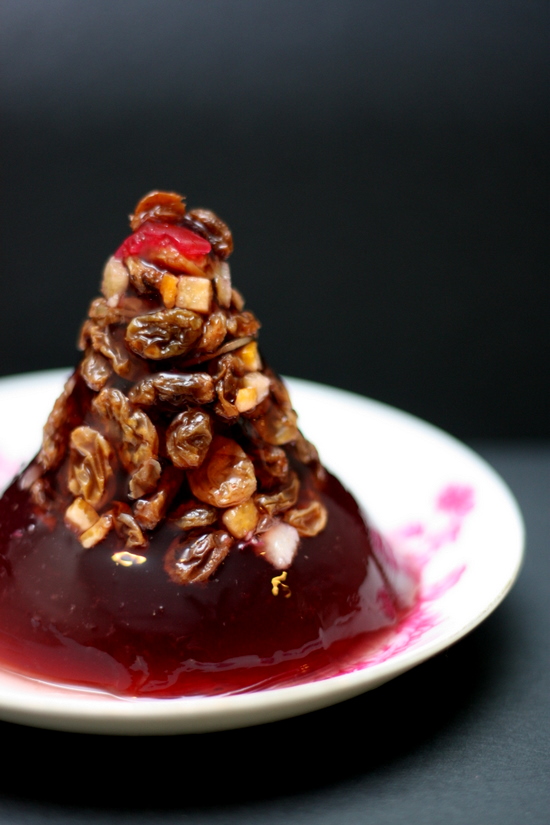 Since I started on Halloween, I might as well go the extra mile and throw in Christmas.
This particular jelly is inspired by the famous jellymongers, Bompass & Parr.
In their book, they have a recipe for Hippocras Jelly, one that is made with mulled red wine.
Rather than spending time making the wine, I decided to take a shortcut and use a cordial with similar flavours.
I'm a big fan for Belvoir Fruit Farms elderflower presse that I used to make my strawberry and mint jelly. This time I used Spiced Winter Berries cordial (from Village Grocer) that uses fruit juices mixed with spices such as nutmeg, cinnamon and cloves.

As good measure, I also included two 10 cents coins within the jelly. It signifies that you will have good luck if you manage to find it.
I kinda did not expect it but the mixed fruits (sultanas, mixed peel and glace cherries) seemed to have expanded and floated outside of the jelly to create a pretty effect.
Do give this recipe a try as it is a great alternative to the more stodgy Christmas pudding. The hint of warmth from the spices definitely makes this a keeper recipe. I'll definitely make this again for the upcoming Christmas. Just add decadent custard and you will have a big winner on your hands.
Christmas Pudding Jelly (Makes for one mould)
5 tablespoons Belvoir Spiced Winter Berry cordial
175ml water
1 tablespoon gelatine powder
4 tablespoons mixed fruits
Mix the cordial and water together. Sprinkle gelatine powder over a little water to soften. Once expanded, heat the cordial mixture. Pour the hot mixture into gelatine mixture. Add a little mixed fruits in the mould. Pour jelly mixture. Keep adding a little mixed fruits and jelly mixture until it reaches the top. Chill for 3 hours or overnight for a firmer jelly. Unmould and serve straight away.
Reminder: Support the cause by buying a Royal Selangor Nick Munro pewter mould as all proceeds go to breast cancer welfare association. Also, do remember to submit your suggestions to booliciouskl@gmail.com or leave a comment for the mould to win the Olympus camera VG-110. For more pictures, see the Flickr set for all the whole Royal Selangor Jellyriffic challenge. To view, all the jellies, see this link to the Royal Selangor website.
 The Internet is driving me mad...so slow and just when I have to sort out all my posts.
Aargh! This is so frustrating.
Okay, rant over...I better get on to today's post.
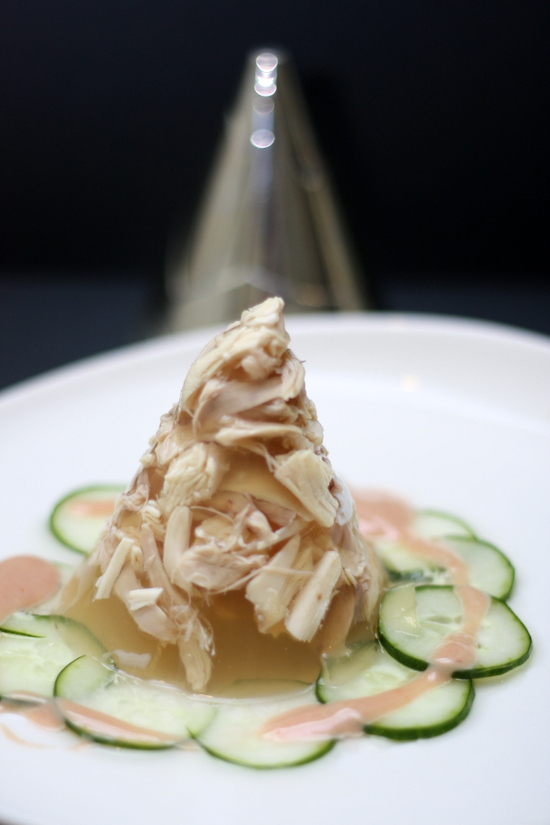
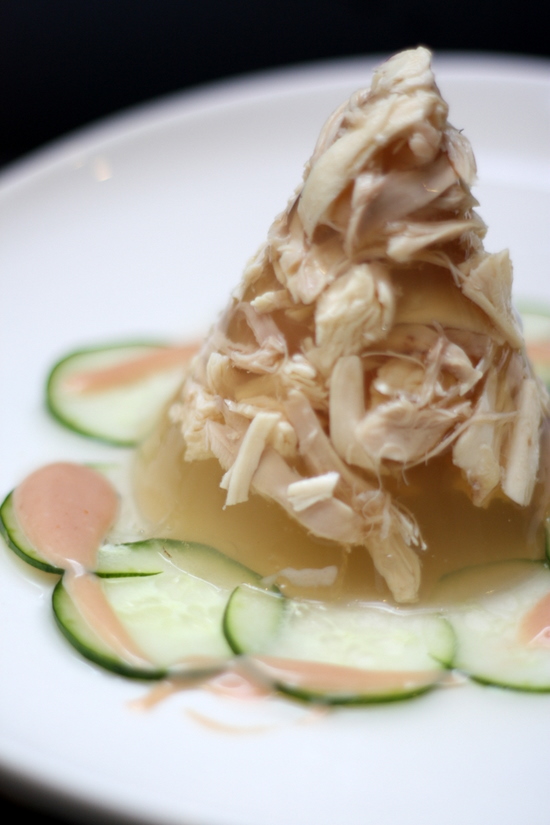
A fellow blogger aka alilfatmonkey had asked me to consider doing an old time favourite, the cold chicken jelly from Pudu's Sek Yuen.
The Chinese restaurant is famous for serving retro food from the 1960s including this appetizer.
Usually made in a rice bowl, it has shredded chicken set in jelly that is served on a bed of lettuce.
I've made my own version, with a few short cuts since I had to maximise my time during this weekend.
The ingredients are cobbled together from the chicken rice shop. Clear chicken soup for the jelly base while the poached chicken is shredded.
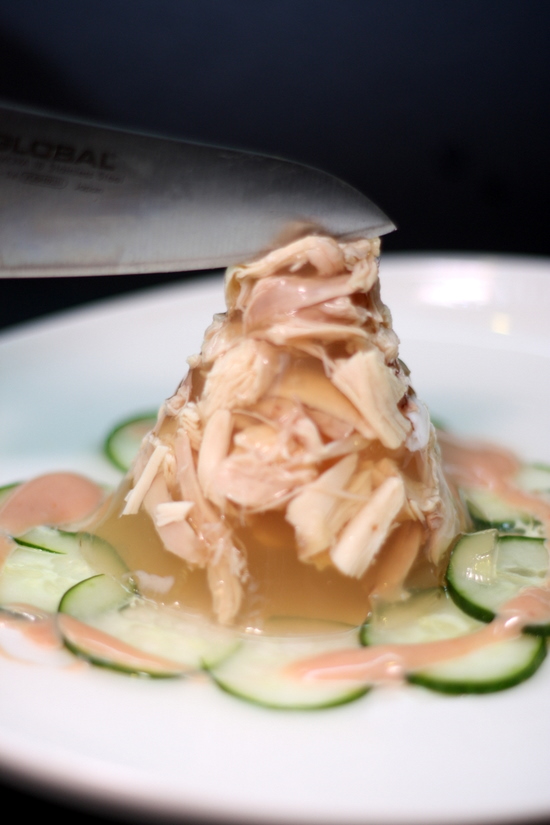
My version contains a little surprise nestled within that you get to by digging through....a poached egg with a soft egg yolk centre.
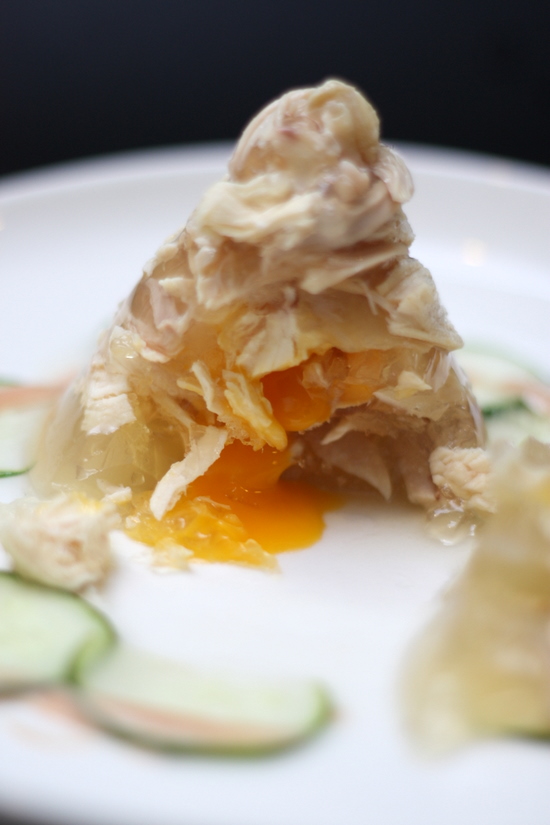
Set on a bed of Japanese cucumbers and served with a pinkish sauce that reminds me a little of prawn cocktails, it's finger licking good that I wished I had made more.
Do give the simple recipe a try as it'll definitely surprise your friends and family at home.
Cold Chicken Jelly (Makes for one mould)
170ml chicken soup
1 tablespoon gelatine powder
shredded chicken
1 egg, poached
Japanese cucumber, sliced thinly
sauce
1/2 tablespoon tomato ketchup
1/2 tablespoon chilli sauce
1 tablespoon Kewpie mayonnaise
1 tablespoon condensed milk
Soften gelatine powder by sprinkling over a little water. Bring soup up to boil. Add to gelatine powder to melt and combine. Place shredded chicken in mould and pour over jelly mixture. Set the poached egg in the middle. Surround with chicken and jelly mixture. Chill for 2 hours or more for a firmer jelly. Mix the sauce ingredients and taste to your liking.
To serve: Arrange cucumber slices in a circle. Unmould jelly by dipping mould in hot water. Place jelly on top of cucumbers. Drizzle sauce on the side. Eat and have fun looking for the egg that oozes out.
Reminder: Support the cause by buying a Royal Selangor Nick Munro pewter mould as all proceeds go to breast cancer welfare association. Also, do remember to submit your suggestions to booliciouskl@gmail.com or leave a comment for the mould to win the Olympus camera VG-110. For more pictures, see the Flickr set for all the whole Royal Selangor Jellyriffic challenge. To view, all the jellies, see this link to the Royal Selangor website.
 Candy and Halloween....that works like magic for me.
Local kids don't seem to have adopted the habit of trick and treat yet.
But at my home, since it mainly houses Japanese expatriates, the kids tend to ring your doorbell and ask for sweets. Hence there is always a bag of chocolates or sweets at home to make sure they don't walk away empty handed.
However, I guess things will change with time since Halloween is getting rather commercial in Kuala Lumpur. Instead, the big kids seem to party more - getting dressed up in costumes to "scare" each other.
Hong Kong seem to celebrate it in a huge way. Last year, I was hanging around Lan Kwai Fong and witnessed how the islanders dress up - witches, devils, YMCA guys, cavemen and etc. The amusement parks also go all out and while it was rather juvenile, I kinda enjoyed doing almost all the haunted houses in Ocean Park. They weren't that scary but more like fun to see how everyone reacted to the surprises round the corner.
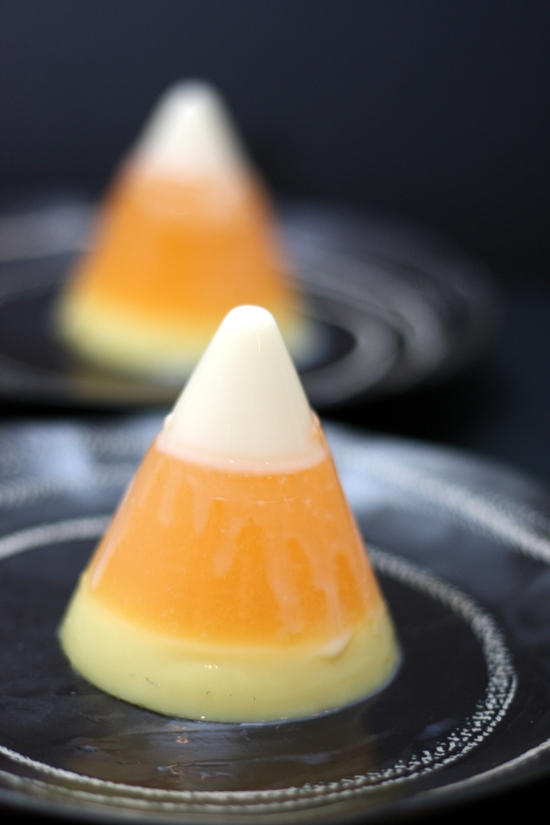
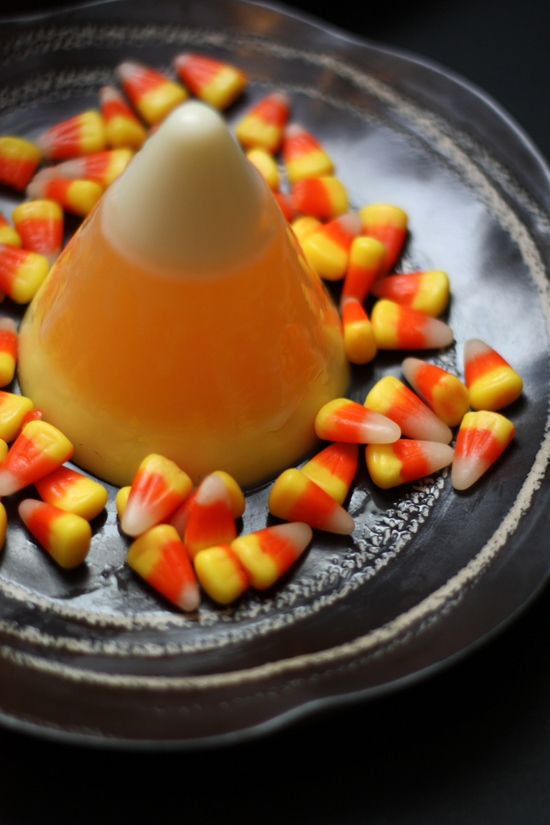
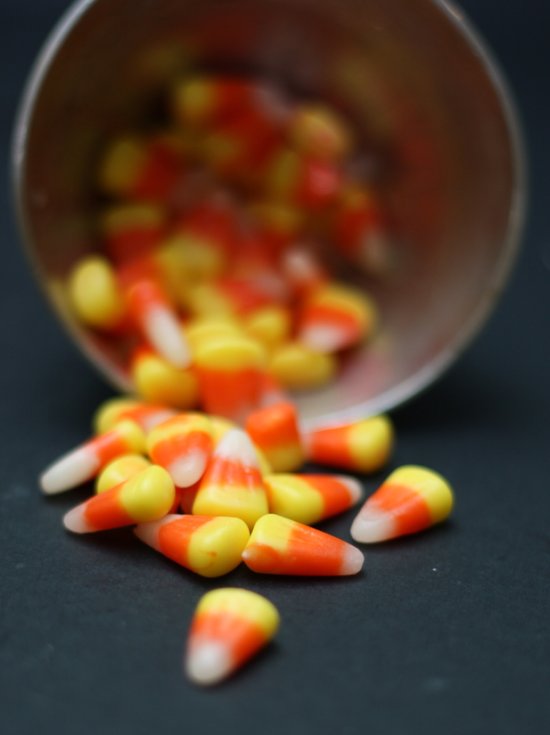
This particular jelly is inspired by the infamous candy corn from Jelly Belly (hmmm, what a great rhyme). I used real condensed milk for this jelly to create the creamy milky and yellow portions. Not sure if any of you are aware but Malaysia has no condensed milk anymore. Instead we are subjected to this doppelganger version called sweetened creamer. No dairy solids within that thickened creamer but instead it is the cheaper palm oil base. Kinda sad how that has been taken from us since the taste we grew up is now gone forever.
It is not that you can't source for the condensed milk anymore but the real ones are usually imported in from overseas and cost a tiny fortune (RM10 above). I often ask people to bring back a can of it from abroad (this can is from London).
Candy Corn Jelly
4 teaspoons gelatine powder
500ml water
100ml condensed milk
1 orange jelly packet
few drops of yellow colouring
Sprinkle 2 teaspoons gelatine powder over 250ml water. Leave to soften. Heat up over low heat, stirring until it melts. Add condensed milk; whisk to combine. Pour 1 1/2 tablespoons of gelatine mixture in the mould. Chill until it sets. In the meanwhile, sprinkle remaining gelatine powder with water. Heat up over low heat and make sure it is melted. Add jelly powder contents, whisk to combine. Pour 8 tablespoons orange mixture on top of the milk layer. Chill to set. Colour the remaining milk mixture with yellow colouring. Pour to form bottom layer. Chill for 4-6 hours to set. Remove from the mould by dipping in hot water.
Reminder: Support the cause by buying a Royal Selangor Nick Munro pewter mould as all proceeds go to breast cancer welfare association. Also, do remember to submit your suggestions to booliciouskl@gmail.com or leave a comment for the mould to win the Olympus camera VG-110. For more pictures, see the Flickr set for all the whole Royal Selangor Jellyriffic challenge. To view, all the jellies, see this link to the Royal Selangor website.
 Ten more days to the end of this challenge....
It's becoming routine nowadays that I suspect I'll miss my crazy jelly moments or more like roller coaster ride.
It starts out with a high, that eureka moment where I start thinking how about capturing a certain memory in jelly form. Like this root beer float, a drink from the past.
The memories for each jelly is often sweet...like this one where I remember sipping from tall frosted glasses at the A&W drive in.
Then comes the actual engineering of the jelly, how to recreate it. After that comes the tinkering in the kitchen - the layering of the jelly where I'll curse myself and say I should have taken an easy way out.
Once it goes into the refrigerator, I kinda forget it until night falls.
Then the self doubt starts...what happens if it fails? I don't have a back-up plan. So I heat up the kettle, rummage through the refrigerator.
It's a small elation on my part when I see it had set properly. Then comes the dangerous dip with the hot water, the shaking and of course, it comes out from the mould. Whew! It's okay and it wobbles beautifully.
Once the beauty shots are taken, then it is tasting time while I edit pictures and write it out.
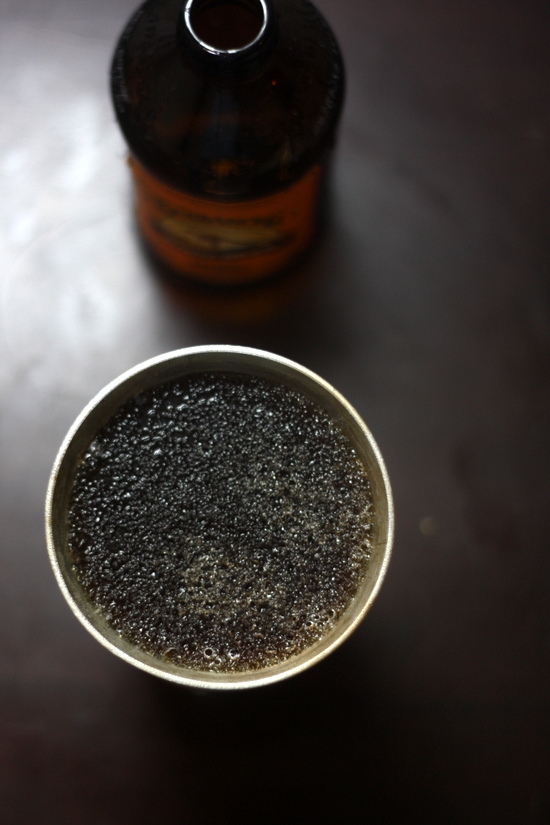
Did it work this time? I reckon it did as I love the ice cream tip and the slight fizzy taste at the end. The Bundaberg root beer is rather faint in taste but it kinda feels almost like the real thing. All I need is some waffles with ice cream or a coney dog and I may think I'm back in the A&W drive in.
Root Beer Float (Makes two moulds)
vanilla ice cream layer
100g vanilla ice cream
2 1/2 teaspoons gelatine powder
50ml hot water
root beer layer
300ml root beer
50ml hot water
2 tablespoons gelatine powder
Sprinkle gelatine powder over 1 teaspoon of water. Leave to bloom. Add hot water to melt. Combine gelatine mixture with vanilla ice cream. Spoon 2 1/2 tablespoons of mixture into mould. Place remaining mixture in another bowl. Chill in the refrigerator to allow it to set. Sprinkle gelatine powder over 1 tablespoon water. Add hot water to melt. Mix with root beer. Slowly pour over set vanilla ice cream layer. Chill for at least 5 hours. Remove from mould by dipping in hot water.
Reminder: Support the cause by buying a Royal Selangor Nick Munro pewter mould as all proceeds go to breast cancer welfare association. Also, do remember to submit your suggestions to booliciouskl@gmail.com or leave a comment for the mould to win the Olympus camera VG-110. For more pictures, see the Flickr set for all the whole Royal Selangor Jellyriffic challenge. To view, all the jellies, see this link to the Royal Selangor website.