Wednesday, October 19, 2011

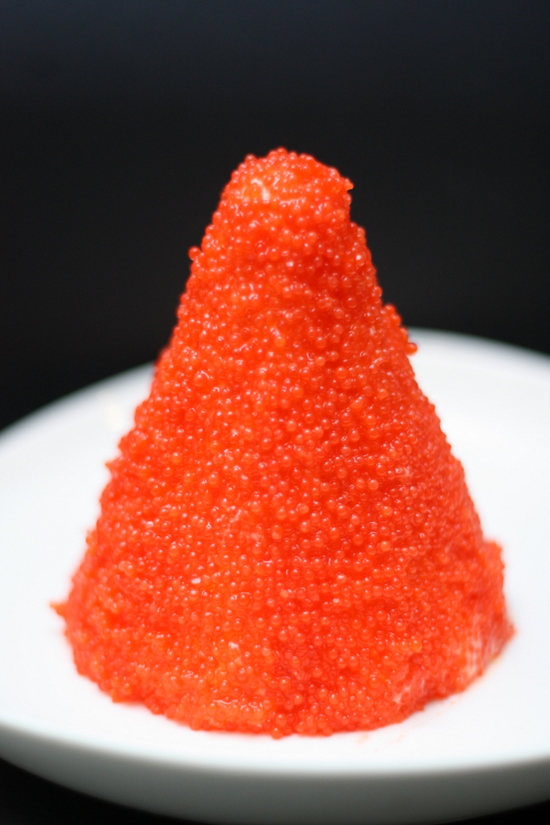
Get Your Jelly On! Day 19 - The Decadent One (Smoked Salmon Mousse with Caviar)

IMG_5865

I've decided to give mid-week blues a bit of boost...the decadent way.


Instead of a jelly, I decided to go for a savoury mousse.

IMG_5870


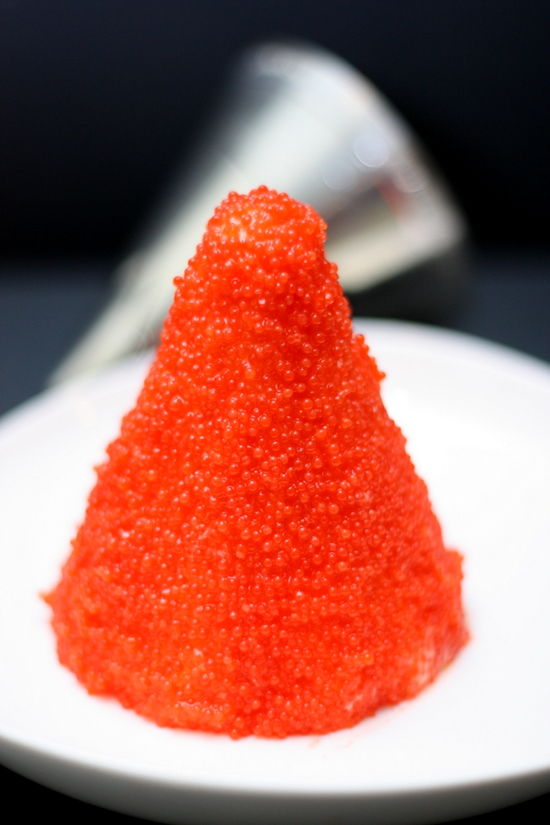
Not any ordinary mousse but a luxurious one topped with lots and lots of caviar.


One does love this a lot - the soft luxurious mousse that touches your tongue with a whisper while each caviar egg pops in the mouth.
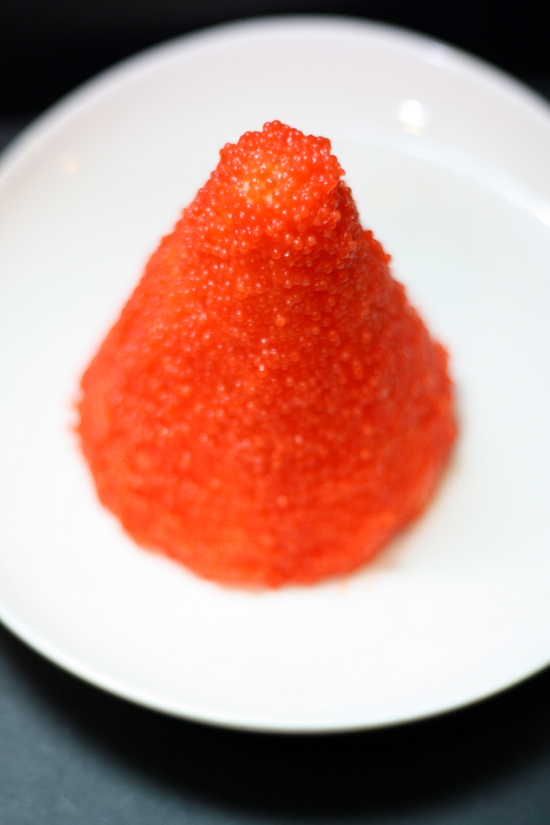

IMG_5867


There's also the savoury kick on the end that makes you crave for more and more.
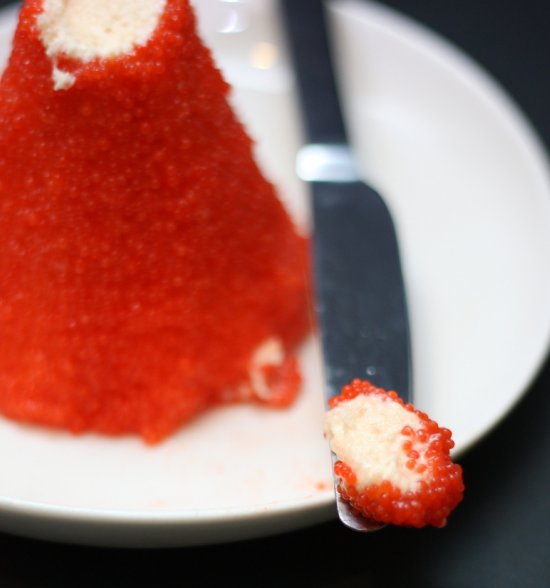

  IMG_5875


Believe me, I just shot the picture and swiped a bit from the top and I could not stop eating it.


One suggest you alleviate the guilt with some crackers but hey if you're suffering from mid-week work blues, just throw wind to caution and pop bits of this decadence in the mouth. 


Smoked Salmon Mousse with Caviar (Makes for two moulds)


2 pieces smoked salmon
180ml thick cream
1 tablespoon butter
1 tablespoon gelatine powder
1 tablespoon water
lumpfish caviar


Blend smoked salmon, 60ml cream and butter together. Sprinkle gelatine powder over water in a bowl. Leave for 1 minute. Heat up in a small pot till it melts. Mix with smoked salmon mixture. Beat remaining cream until it forms soft peaks. Combine with smoked salmon mixture. Line the mould with cling film or greaseproof paper that has been greased. Chill for 8 hours or overnight. Remove from the mould. Add as much caviar as you like. Slowly enjoy the decadent treat with plain crackers.


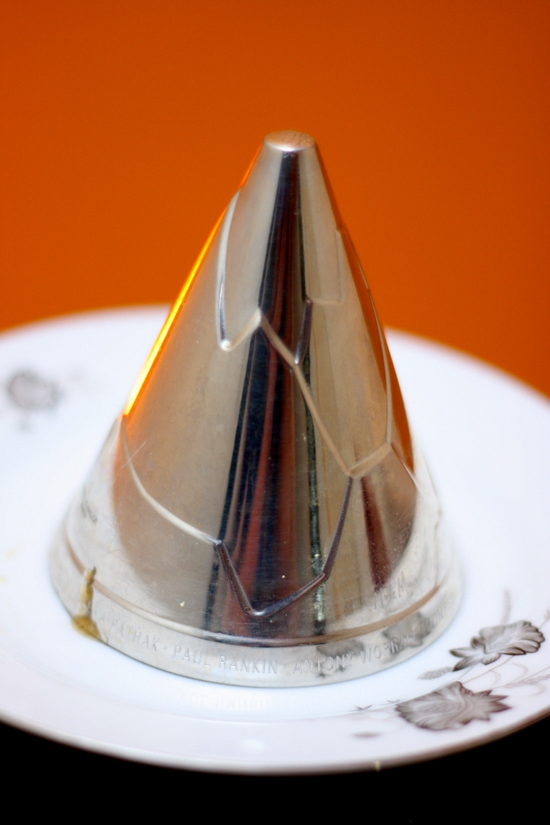
Reminder: Support the cause by buying a Royal Selangor Nick Munro pewter mould as all proceeds go to breast cancer welfare association. Also, do remember to submit your suggestions to booliciouskl@gmail.com or leave a comment for the mould to win the Olympus camera VG-110. For more pictures, see the Flickr set for all the whole Royal Selangor Jellyriffic challenge. To view, all the jellies, see this link to the Royal Selangor website

Tuesday, October 18, 2011

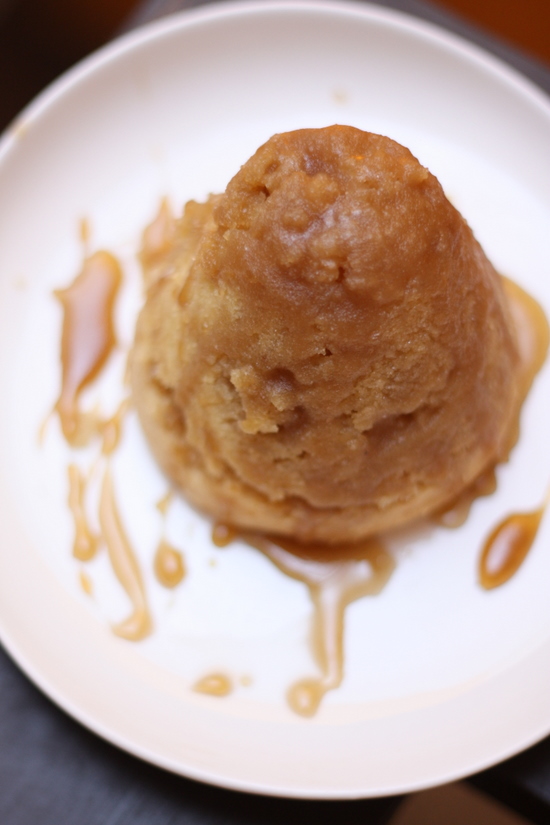
Get Your Jelly On! Day 18 - The Brit (Steamed Maple Syrup Pudding)

IMG_5850

When I was studying in England, one of the best things I discovered was my love for steamed puddings.


My hall of residences was a little weird. Instead of a cafe food system for dinner time, we'll always sit down to eat together at an affixed time.


IMG_5857

 The food was never great stuff you would write home about but one thing stood out, their incredible ability to churn out these soft steamed puddings that we would eat with lashings of custard.

Every time they served steamed pudding, I'll make sure I attend dinner. The soft texture of the pudding with the creamy custard was so worth while sitting through rubbery lamb chops and awful fish and chips.

I've decided to recreate a little of my university memories with this steamed maple syrup pudding. Maple syrup ain't very Brit though (in fact it came from Minnesota Red Lake where I visited the Native Indian tribes) but I didn't want to use golden syrup since there's not much taste to it.

Do enjoy it and hopefully it'll create a memory for you that you can relive another time just like how steamed puddings hold a big significance for me.

Steamed Maple Syrup Puddings (Makes 2 moulds and a little more)


125ml maple syrup
75g butter, softened
75g caster sugar
1 egg
1/2 teaspoon vanilla extract
150g plain flour, sifted
1 teaspoon baking powder, sifted.
125ml milk


Heat maple syrup for 7-9 minutes or until thickened. Grease the moulds lightly with butter. Ladle thickened syrup inside and chill while you make the pudding batter. Beat remaining ingredients until combined. Spoon mixture into moulds. Cover with foil. Steam with the water up to 1/2 way through for 40 minutes. Remove and unmould. Enjoy with extra syrup and vanilla ice cream.


Reminder: Support the cause by buying a Royal Selangor Nick Munro pewter mould as all proceeds go to breast cancer welfare association. Also, do remember to submit your suggestions to booliciouskl@gmail.com or leave a comment for the mould to win the Olympus camera VG-110. For more pictures, see the Flickr set for all the whole Royal Selangor Jellyriffic challenge. To view, all the jellies, see this link to the Royal Selangor website


Monday, October 17, 2011

Get Your Jelly On! Day 17 - Sweet and Sour (Lychee Assam Boi Jelly)

IMG_5836

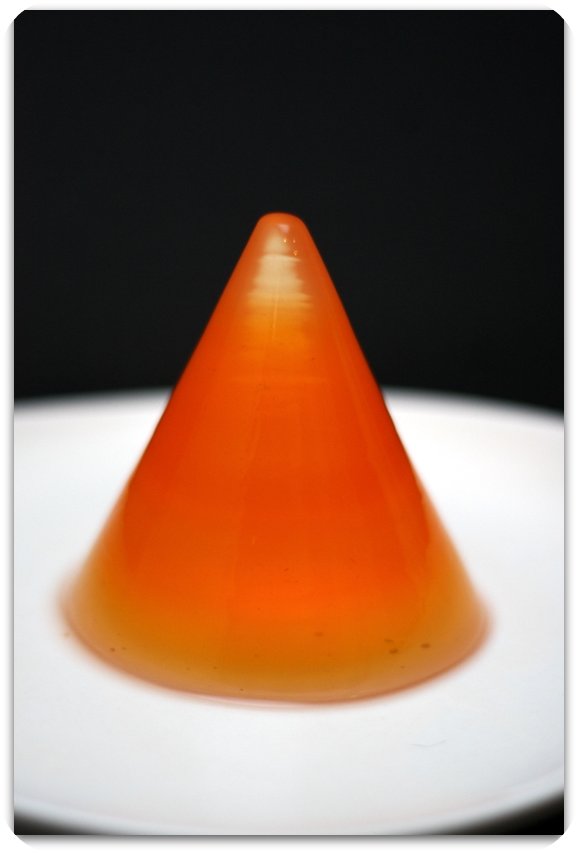
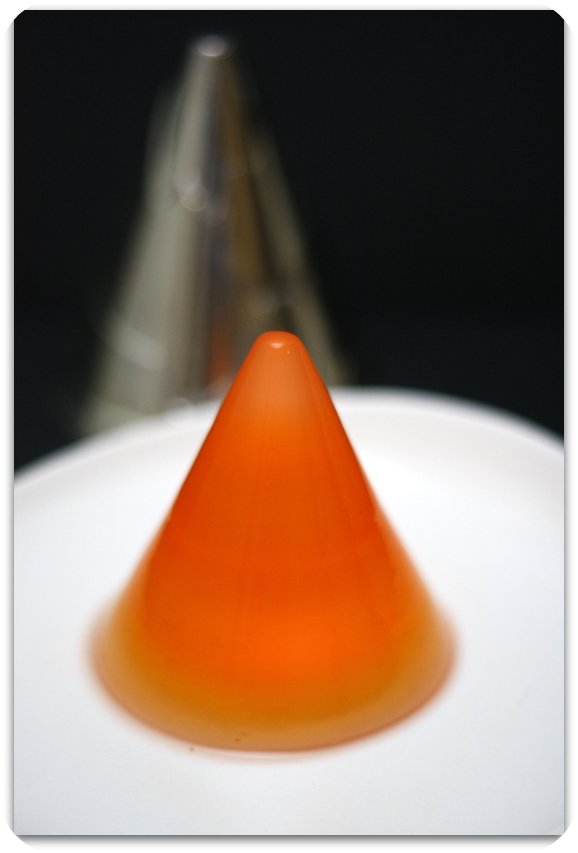
The blog seems to be going through the warmer shades of the rainbow...first yellow yesterday and now this brilliant orange in this jelly inspired by a favourite drink, the Lychee Assam Boi - a refreshing sweet and sour beverage to beat the heat.


IMG_5839


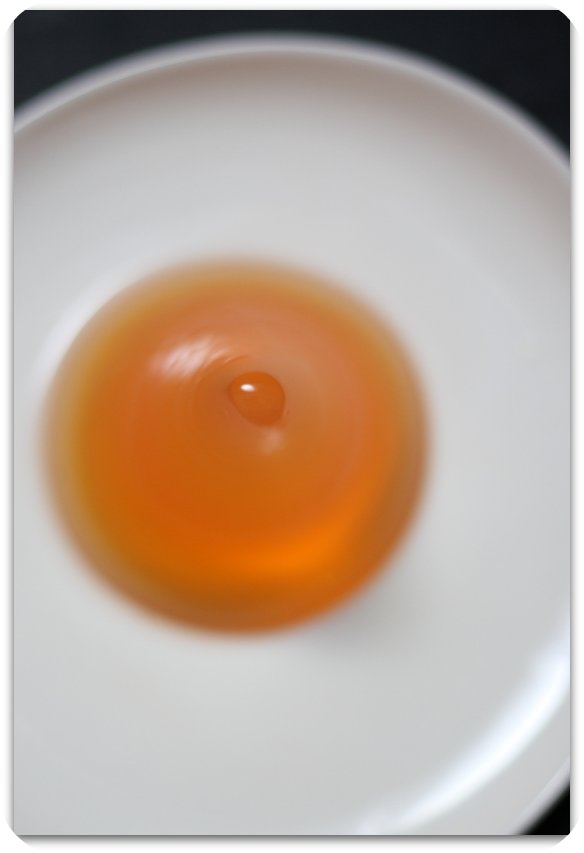
It's not a perfect jelly as I kinda envisioned it as a riband version since it was going to be a combination of two flavours. Unfortunately I didn't realise that the clear portion would have been overshadowed by the bright orange. If you look at it closely, you can make the clear jelly parts but they don't come out too well in the photos. However, it did make a very pretty jelly when I shot it.


IMG_5837 


I loved the taste of this though. Very refreshing as the assam and lychee tastes don't overwhelm each other. I reckon a few of these will definitely beat the heat away. 


Lychee Assam Boi Jelly (Makes two moulds)


10 assam boi
450ml boiling water


450ml lychee juice, drained from canned lychees
4 tablespoons gelatine powder


Place assam boi in a bowl. Add boiling water. Leave for 1 hour. Strain the liquid. Place 2 tablespoons gelatine powder in a small bowl. Add a little water and leave to bloom. Heat the assam liquid and bloomed gelatine powder. Whisk to combine. Slowly bring to boil over low heat. Pour into a measuring jug. Place remaining gelatine powder in the same bowl. Add water to bloom. Heat lychee juice in a clean pot over low heat. Add bloomed gelatine powder; whisking to combine. Bring to boil. Remove and pour into measuring jug. Add layer by layer of lychee and assam boi jelly and chill for 4-5 hours. Unmould by pouring hot water over the mould.


Reminder: Support the cause by buying a Royal Selangor Nick Munro pewter mould as all proceeds go to breast cancer welfare association. Also, do remember to submit your suggestions to booliciouskl@gmail.com or leave a comment for the mould to win the Olympus camera VG-110. For more pictures, see the Flickr set for all the whole Royal Selangor Jellyriffic challenge. To view, all the jellies, see this link to the Royal Selangor website

Sunday, October 16, 2011

Get Your Jelly On! Day 16 - Bersih (Mango Bavarois)

IMG_5827

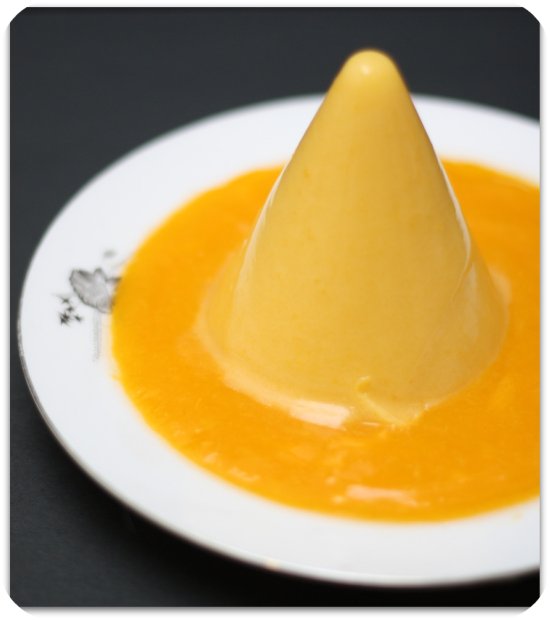
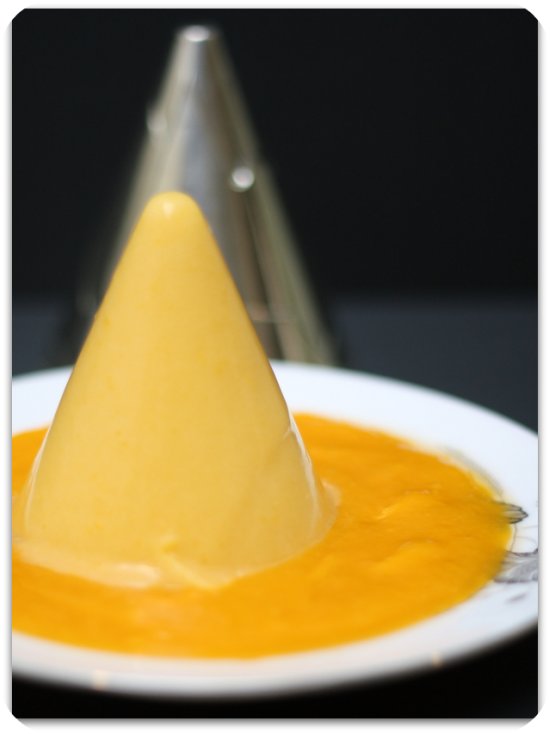
Yellow signifies many things.


For me, it's the sign of bright cheery things (which I hope are coming my way this coming week).


For some, it is the trademark colour for the call of electoral reforms in Malaysia hence the name "Bersih" that means clean in Malay. 


IMG_5832


There's definitely a lot of pink and green in the blog lately but not enough of this bright cheery palette.


IMG_5811


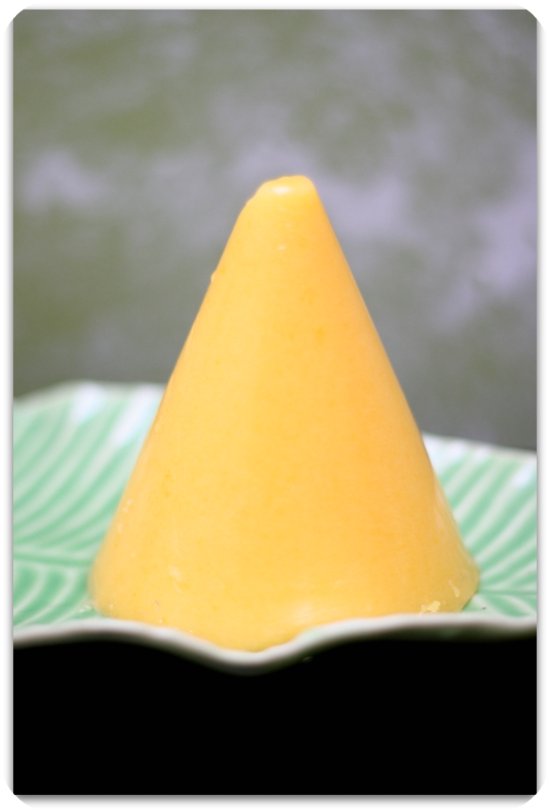
The original intention was to make mango pudding that failed spectacularly in a pile of mush on Saturday. Hence I decided to rework the recipe and made it to a creamy bavarois. I suspect the gelatine powder could be a little less so this jelly can have a soft texture. Now it has a rubbery crunchy texture that is rather pleasant to eat especially chilled.


Here's to a great cheery Monday and electoral reforms in this country. We definitely need both of them.


Mango Bavarois (Makes 2 moulds and a little to spare)


100g caster sugar
6 tablespoons gelatine powder
200ml water
2 tablespoons lemon juice
200g fresh mangoes, strained
100ml water
100ml cream


mango puree, made from blending fresh mangoes


Combine sugar, gelatine powder, water, lemon juice in a pot. Stir over low heat until it comes to boil. Turn off the heat. Add mangoes and water. Reheat. Remove from the heat and leave to cool. Whisk cream until it forms soft peaks. Combine with the mango mixture. Pour into moulds. Chill for at least 2 hours. Remove from the mould and serve with mango puree.


Reminder: Support the cause by buying a Royal Selangor Nick Munro pewter mould as all proceeds go to breast cancer welfare association. Also, do remember to submit your suggestions to booliciouskl@gmail.com or leave a comment for the mould to win the Olympus camera VG-110. For more pictures, see the Flickr set for all the whole Royal Selangor Jellyriffic challenge. To view, all the jellies, see this link to the Royal Selangor website

Saturday, October 15, 2011

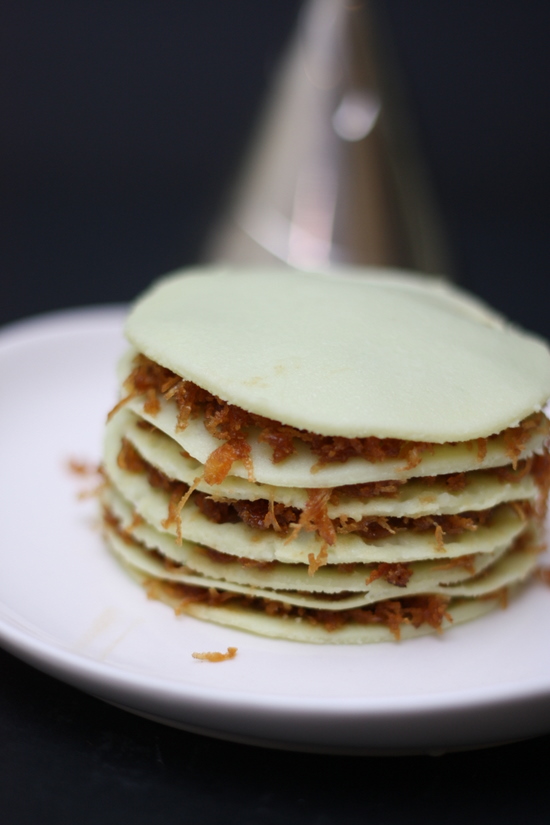
Get Your Jelly On! Day 15 - The Stack (Pandan and Coconut Crepes)

IMG_5777

Halfway through this challenge and today seemed to be the worst ever.


The first idea had an epic fail. I turned it over and it was just one big puddle on the plate.

IMG_5780

Then came the second contingency, the crepe stack. I had visions of a beautiful conical one. 


Obviously I'm a bad engineer since that's not possible unless I have varying sizes for round cutters.

 IMG_5785

Hence the second nightmare began, I made one stack that looked like the cat had dragged in since it had all sorts of sizes.


Okay, so it was back to the drawing board to make another batch.


IMG_5788 


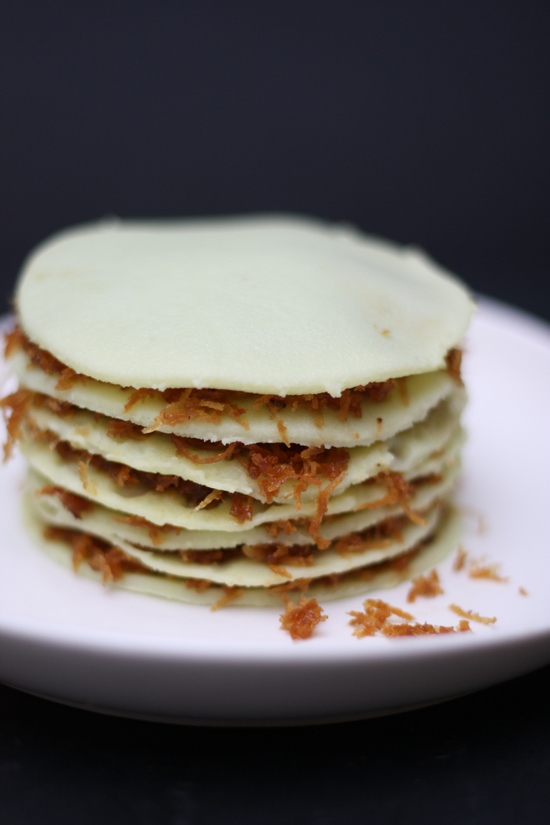
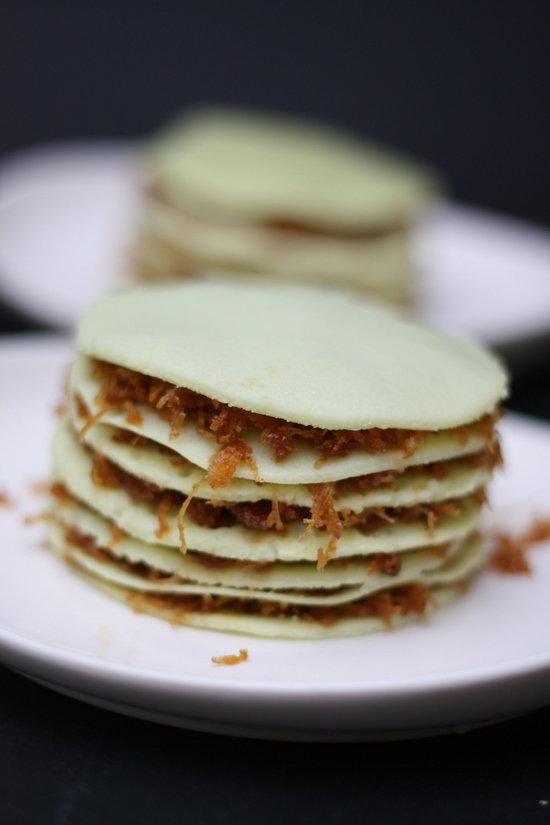
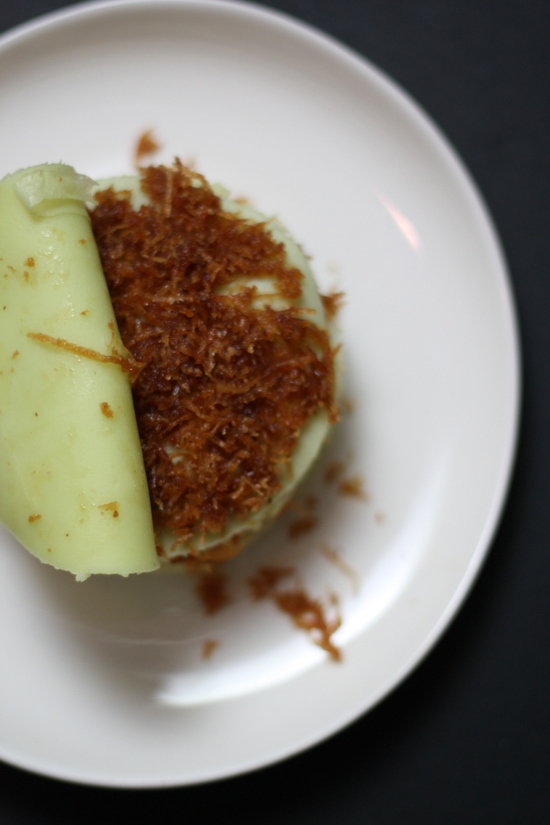
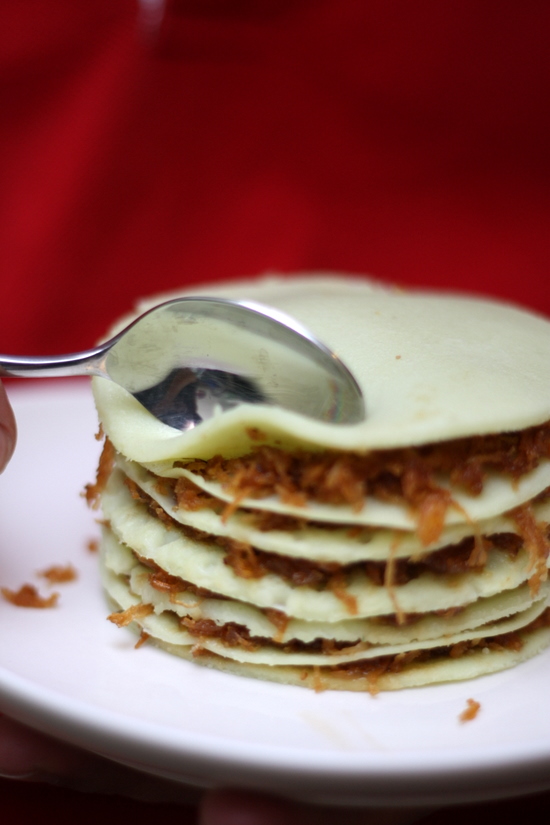
I patiently made a batch of green pancakes and cut them in rounds with my Royal Selangor pewter mould. They make beautiful perfect rounds that look gorgeous stacked up with the coconut filling.


  IMG_5794


I was finally happy with the results and its taste, nice and light with the coconut filling - after so many tries I have my winner.


The Stack (Pandan and Coconut Crepe) (adapted from Nonya Recipes by Debbie Teoh)


coconut filling
1/2 grated coconut
100g palm sugar
50g sugar
100ml water
2 sprigs pandan leaves


crepes
160g plain flour
1 teaspoon corn flour
1 egg
160ml thick coconut milk
300ml water
2 tablespoons pandan juice
few drops of green colour


To prepare filling: Cook palm sugar, sugar, water and pandan leaves tied in a knot until the sugars melt. Add grated fresh coconut; mix to coat thoroughly. Over the heat slowly heat up until the sugar mixture dries up a little. Remove from the heat. Set aside on a plate.


To prepare crepes: Whisk all ingredients together; sift to remove any lumps. Heat a frying pan; grease with a little oil. Pour one ladleful of batter in the hot pan. Shake to let batter cover pan. Cook over low heat. Remove and place on a plate. Keep it seperate with paper towels. Continue until the batter finishes.


To assemble: Cut the crepes into round shapes with the Royal Selangor pewter mould. Set aside. Place one piece on a plate. Add coconut filling and spread. Add another crepe. Repeat with coconut filling and crepes. Serve immediately.


Reminder: Support the cause by buying a Royal Selangor Nick Munro pewter mould as all proceeds go to breast cancer welfare association. Also, do remember to submit your suggestions to booliciouskl@gmail.com or leave a comment for the mould to win the Olympus camera VG-110. For more pictures, see the Flickr set for all the whole Royal Selangor Jellyriffic challenge. To view, all the jellies, see this link to the Royal Selangor website

Friday, October 14, 2011

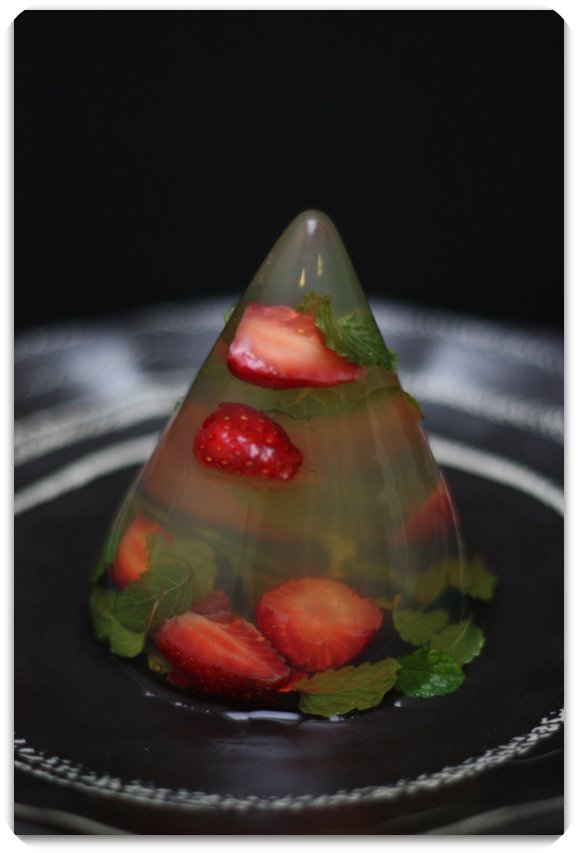
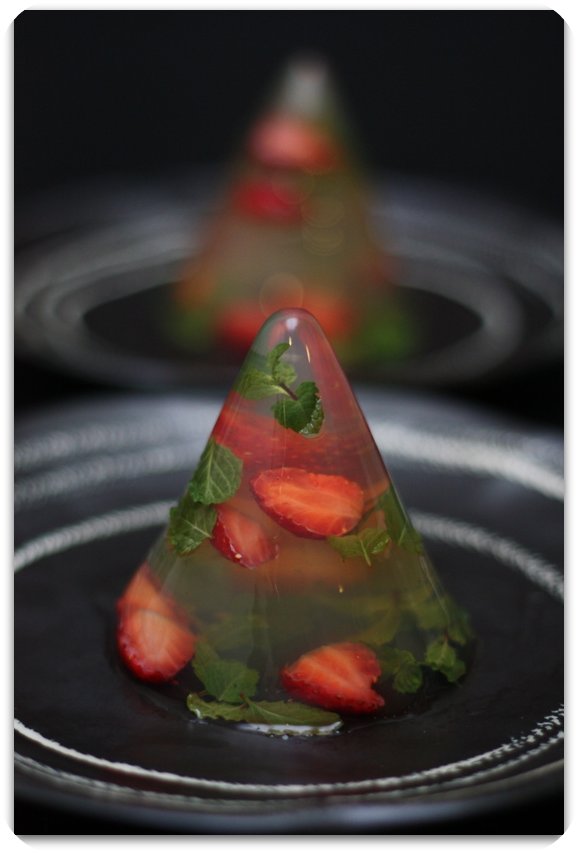
Get Your Jelly On! Day 14 - The Clear One (Elderflower, Strawberry and Mint Jelly)

IMG_5755

If I don't work with jelly, I get little anxiety attacks.

While I can experiment with new fangled ideas, there's a niggling thought at the back of my brain that I should be championing jelly.


Hence this particular jelly that came about as a "throw together in the fridge" version.


I often find my good ideas unraveling after mid-week, hence the best intentions are never fulfilled.


IMG_5741


Being short of a few items for the next planned jelly meant I needed an emergency one.


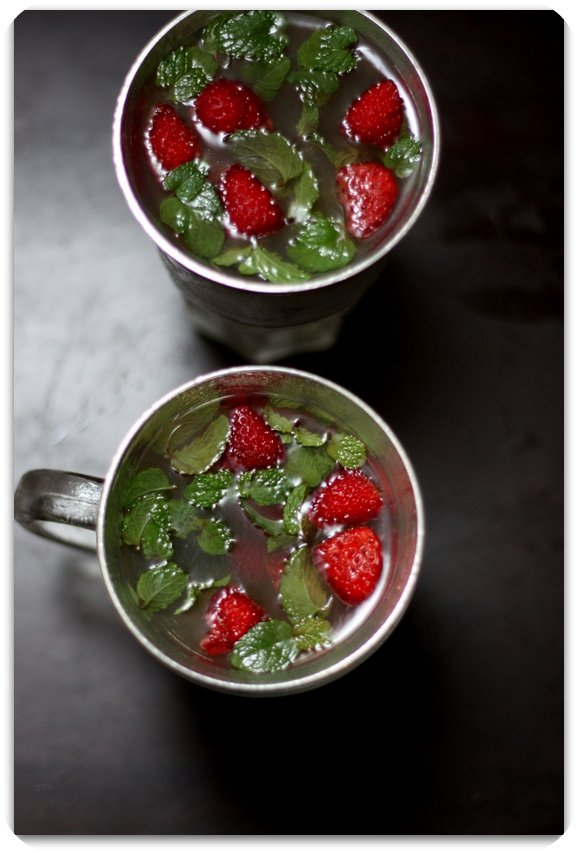
Hence I went through the fridge and emerged with this concoction - the base is elderflower jelly from an au naturel elderflower drink I love from O Gourmet (thanks to my friend CS who introduced me to it). Then as usual I raid my mini herb garden and emerged with lots of tiny mint leaves. Then there's some almost dying strawberries that I salvage to make this very pretty masterpiece of red and green.
IMG_5734 


Believe me, this can also be known as the Throw Together jelly since it's a mish-mash of everything.


In terms of taste, it's not fantastic but I do love the cold elderflower jelly, a great idea to enjoy my favourite drink.


Elderflower, Strawberry, Mint Jelly


450ml elderflower drink
2 tablespoons gelatine powder
mint leaves
strawberries, cleaned, stalk removed and halved


Place gelatine powder with some water to allow it to bloom. Heat elderflower drink; add gelatine powder and melt. Pour into a measuring jug. Place mint leaves and strawberries in mould. Pour a little elderflower jelly into mould. Fridge till set. Repeat with mint, strawberries and elderflower jelly until it reaches to the top. Chill for 4 to 5 hours. Unmould by dipping moulds into hot water. Place plate at the bottom. Tilt to unmould. serve chilled.


Reminder: Support the cause by buying a Royal Selangor Nick Munro pewter mould as all proceeds go to breast cancer welfare association. Also, do remember to submit your suggestions to booliciouskl@gmail.com or leave a comment for the mould to win the Olympus camera VG-110. For more pictures, see the Flickr set for all the whole Royal Selangor Jellyriffic challenge. To view, all the jellies, see this link to the Royal Selangor website

Thursday, October 13, 2011

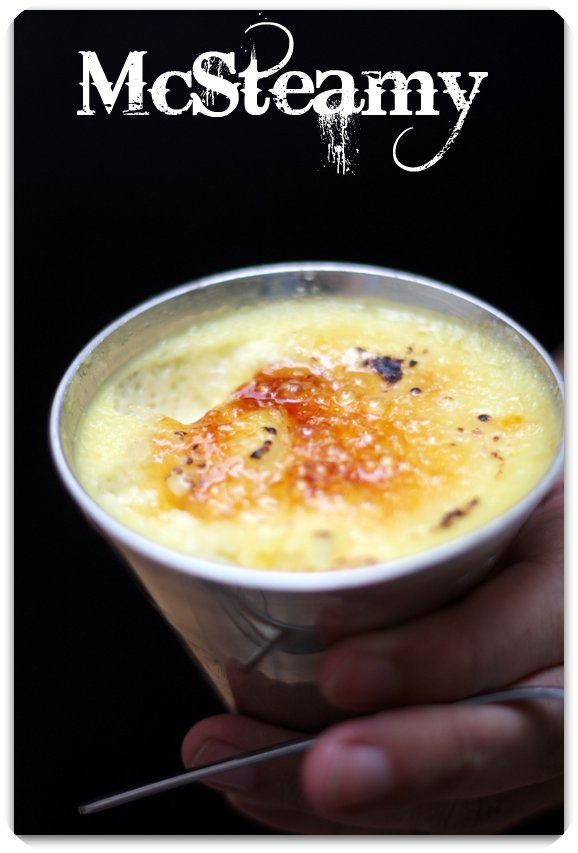
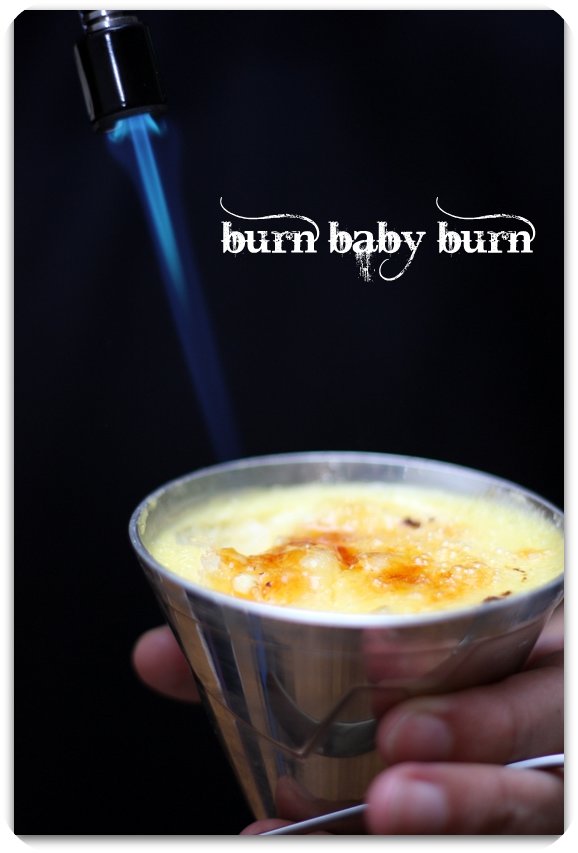
Get Your Jelly On! Day 13 - McSteamy (Steamed Rosemary Creme Brulee)

IMG_5479

I love how my friends rally around me for this 30-day challenge.


After the initial..."you're crazy" statements, they start sharing ideas and recipes.


Take for instance, LH whom I met last weekend over some Yemeni food.


She was raving on about a steamed creme brulee recipe she had just picked up in Singapore.


IMG_5477


Sounded darn interesting, hence I decided to give it a try.


The original recipe had a rosemary flavour but I understand it was tweaked to a lavender version.


Since I didn't have any lavender buds, I decided that I'll raid my rosemary plant. It's strange as the rosemary is the only plant doing well.


Just goes to show how "green" my thumbs are when it comes to plants.


IMG_5470


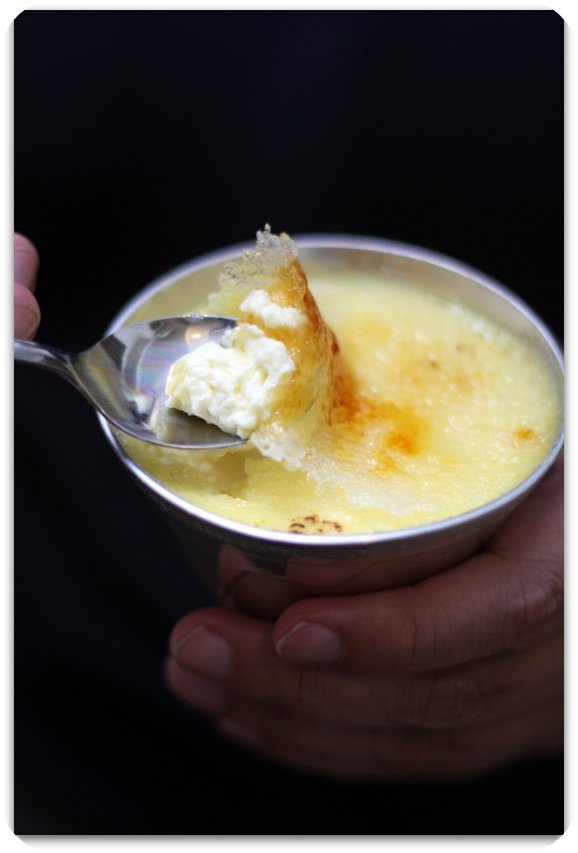
Despite the weird combination, I must admit the rosemary flavour is rather light and slightly floral. 


I did love the creme brulee, a rich creamy one with a light texture. Thanks LH! You're the best.


And don't forget it works well with the pretty Royal Selangor pewter moulds holding it. Now I wonder what the Grey's Anatomy fans will say to its nickname.


Steamed Rosemary Creme Brulee (Makes for 2 moulds)


400ml cream
1 teaspoon rosemary
70g caster sugar
4 egg yolks


Bring the cream to boil over a low fire. Add rosemary and leave for 15 minutes to infuse. Meanwhile, beat the sugar and egg yolks together. Strain the hot milk and pour a little to egg yolk mixture to temper (whisk in). Add egg yolk mixture into hot milk and whisk to combine. Pour into moulds. Cover top with foil. Steam over low heat for 10 minutes or until the middle no longer wobbles. Cool. Chill for 4-5 hours. Remove from the refrigerator. Sprinkle a layer of sugar on top. Blow torch until it browns. Eat immediately.


Reminder: Support the cause by buying a Royal Selangor Nick Munro pewter mould as all proceeds go to breast cancer welfare association. Also, do remember to submit your suggestions to booliciouskl@gmail.com or leave a comment for the mould to win the Olympus camera VG-110. For more pictures, see the Flickr set for all the whole Royal Selangor Jellyriffic challenge. To view, all the jellies, see this link to the Royal Selangor website

Wednesday, October 12, 2011

Get Your Jelly On! Day 12 - French Cone (French Toast with Caramel Apples)

IMG_5427 
It's mid-week and I'm singing the Jelly blues. 


Work has caught up with me. 


With all that stress, the grey brain cells can't seem to think up an inspiring idea. 


Apologies but today is a rather lame entry that looks like a roti canai!??


 IMG_5433 


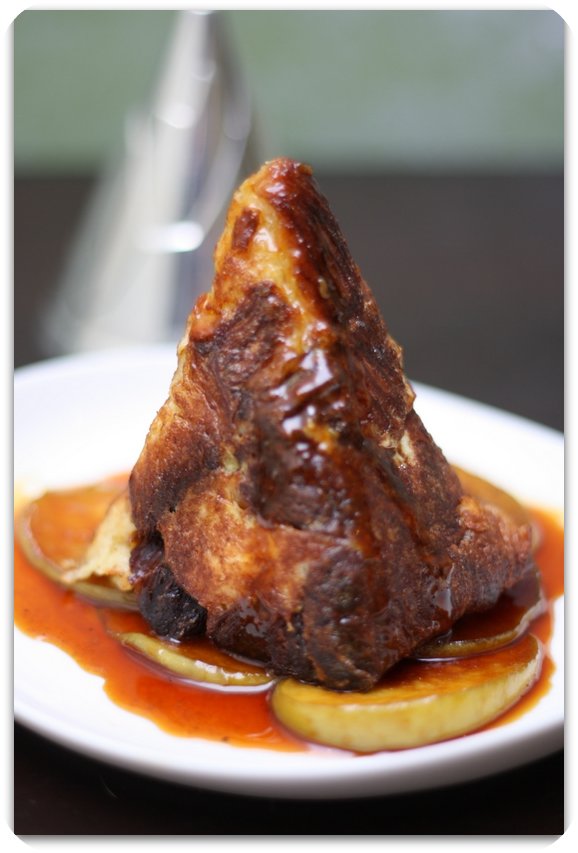
Inspired by the menu on Ben's General Food Store (that started serving brekkie), I decided to make the French Cone (nope it ain't a cap). Per the menu, it described their breakfast item to be made from a rich Bavarian loaf. This was rather simple to acquire from the next door deli. 


However making it into a cone was a big challenge. If I used the side crusts to create the outside wall, it works perfectly but since the loaf was originally a bit on the deeper brown side, it comes out an unappealing darker shade of brown. 


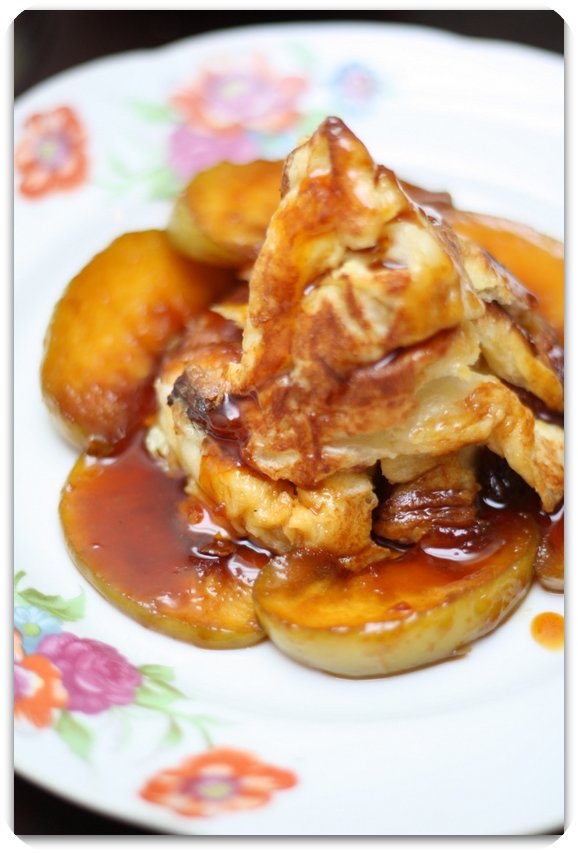
I experimented with the inside of the loaf but this instead gave it an appearance like dimpled roti canai from the eggy mixture. I guess I just could not win this battle. Despite its ramshackle look, it tasted rather alright with the caramel apples I had also made. A bit on the sweeter side but I guess that's the liberty you pay with caramel sauces. Since I'm not much of a morning person, it was rather nice to sit down to a "morning" meal at night. Hopefully I'll shake out of my mid week blues or else the challenge is going to get rather (yawn) boring. 


French Toast with Caramel Apples 


1 bavarian loaf or croissant 
2 eggs
50ml milk 
1 teaspoon vanilla extract 


1 green apple, sliced and cored 
50g caster sugar 
20g butter 
3 tablespoons cream


Beat eggs, milk and vanilla together. Dip slices of the loaf with egg mixture. Stuff into the Royal Selangor pewter mould with the crust facing outwards. Press down to form a cone. Use a knife to loosen it out. Pan-fry it on a hot frying pan until all the sides are slightly brown.


Melt sugar in a clean pot. Once it turns into caramel, add butter to melt. Add apples and cook till soften.  Add cream just before serving.


To serve: Place caramel apples on a plate. Top with the French Cone and serve immediately


Reminder: Support the cause by buying a Royal Selangor Nick Munro pewter mould as all proceeds go to breast cancer welfare association. Also, do remember to submit your suggestions to booliciouskl@gmail.com or leave a comment for the mould to win the Olympus camera VG-110. For more pictures, see the Flickr set for all the whole Royal Selangor Jellyriffic challenge. To view, all the jellies, see this link to the Royal Selangor website

Tuesday, October 11, 2011

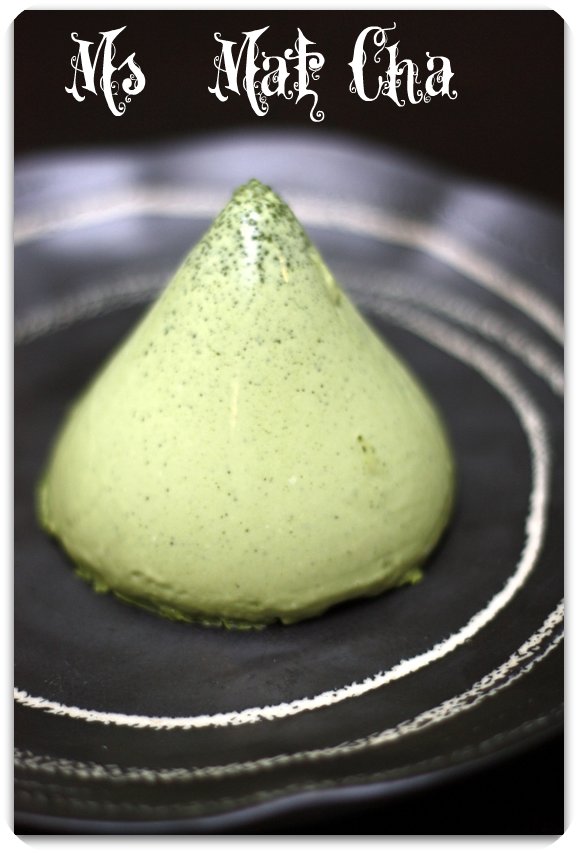
Get Your Jelly On! Day 11 - Ms. Mat-Cha (Green Tea Pannacotta)

IMG_5378

Meet Ms. *Mat-Cha.


She is one slippery babe.


Just throw her into hot water and she slips out of the Royal Selangor pewter jelly mould in a whoosh!


Or like how Nigella Lawson describes it in Top Chef about pannacotta (her kind)..."should have the texture of the wobble of a 17th century courtesan's inner thigh."**


IMG_5362


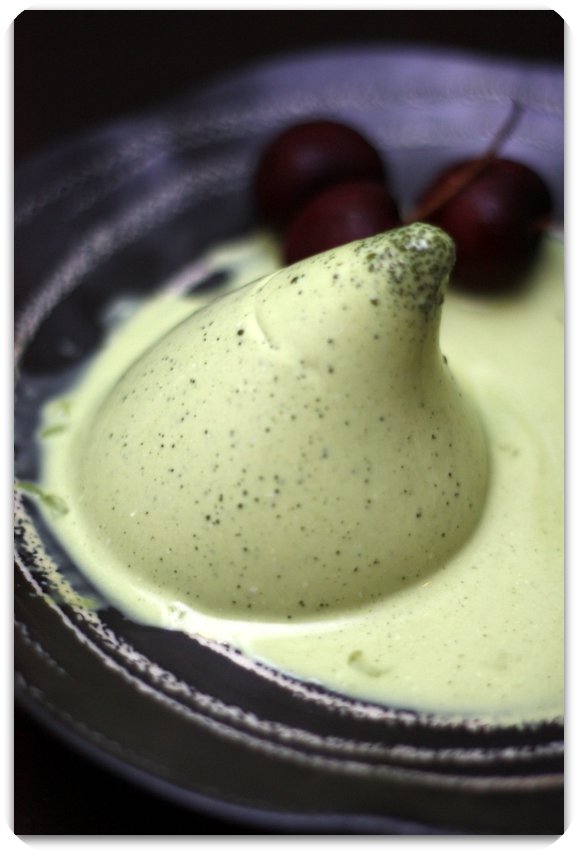
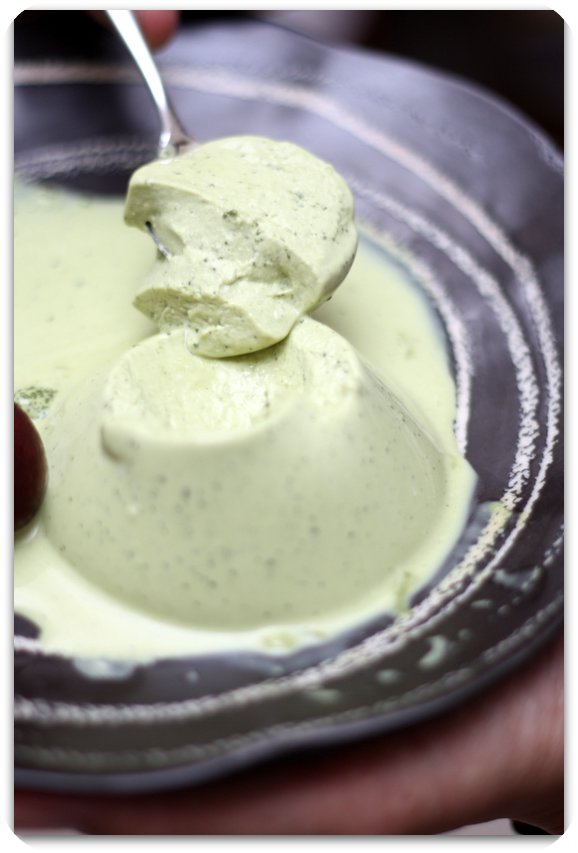
Despite her wobbly shortcomings, she was a delectable creamy morsel that was enjoyed with relish.


IMG_5369


As she whooshed around, I reckon it would have probably been safer to have eaten her in the mould with a teaspoon to avoid any mishaps. But if you want to live a little dangerously, go ahead and dip her in hot water to see how she'll melt for you. 


IMG_5360


Green Tea Pannacotta (From Awaken the Appetite and based on a recipe by Janice Wong)


1 teaspoon gelatine powder
1 tablespoon water
150ml milk
150ml cream
3 tablespoons caster sugar
4 teaspoons green tea powder (preferably Japanese)


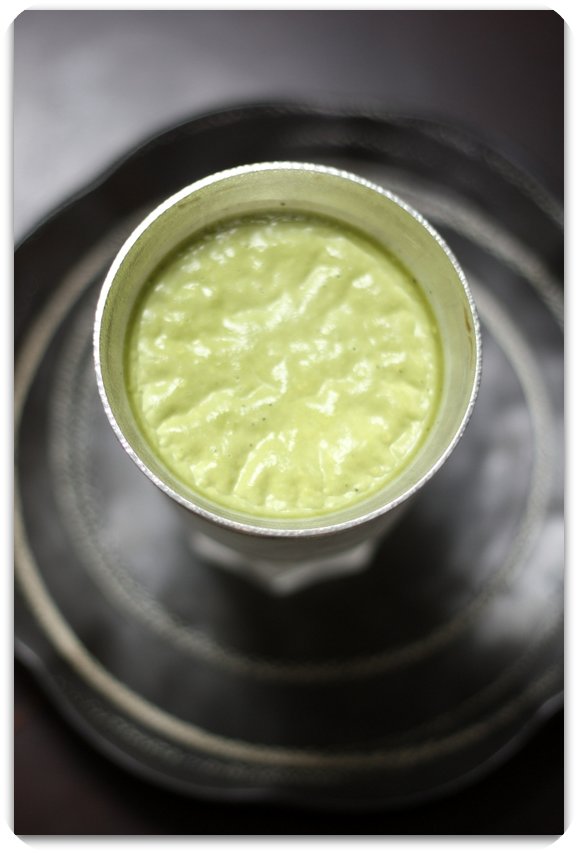
Sprinkle gelatine powder over water. Leave for 5 minutes or until it has bloomed. In a small pot, bring to boil milk, cream and caster sugar. Stir in the gelatine powder; whisk to blend. Mix the green tea powder with a little of the hot milk to form a smooth paste. Whisk in the paste to make sure there are no lumps. Sieve mixture into a measuring jug. Divide among the two Royal Selangor pewter jelly moulds. Chill overnight. Unmould by pouring a little water around the moulds. Loosen with a knife and turn over. If hot water is used it will melt quite quickly. Serve immediately.


An alternate way to serve would be to eat it straight from the mould as the pannacotta is very soft and creamy.


* Mat-Cha is the Japanese word for green tea


** Thanks to the Ravenous Rabbit for that useful insight into the wobble factor


Reminder: Support the cause by buying a Royal Selangor Nick Munro pewter mould as all proceeds go to breast cancer welfare association. Also, do remember to submit your suggestions to booliciouskl@gmail.com or leave a comment for the mould to win the Olympus camera VG-110. For more pictures, see the Flickr set for all the whole Royal Selangor Jellyriffic challenge. To view, all the jellies, see this link to the Royal Selangor website

Monday, October 10, 2011

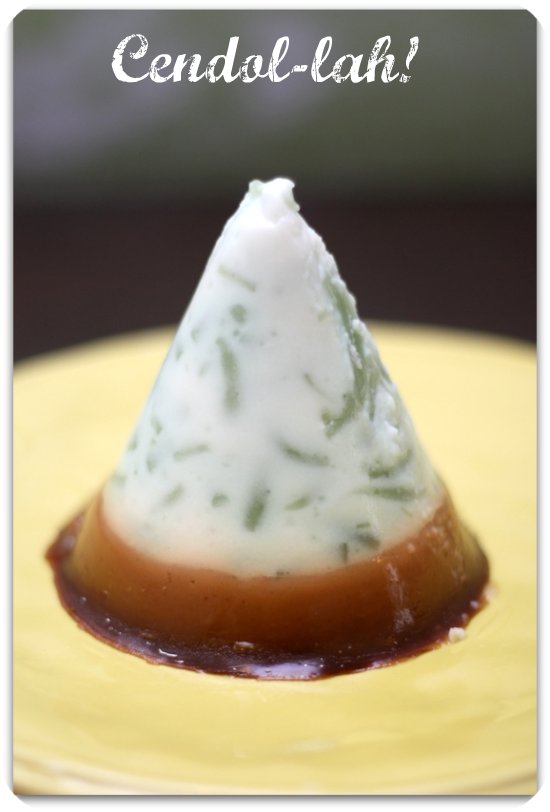
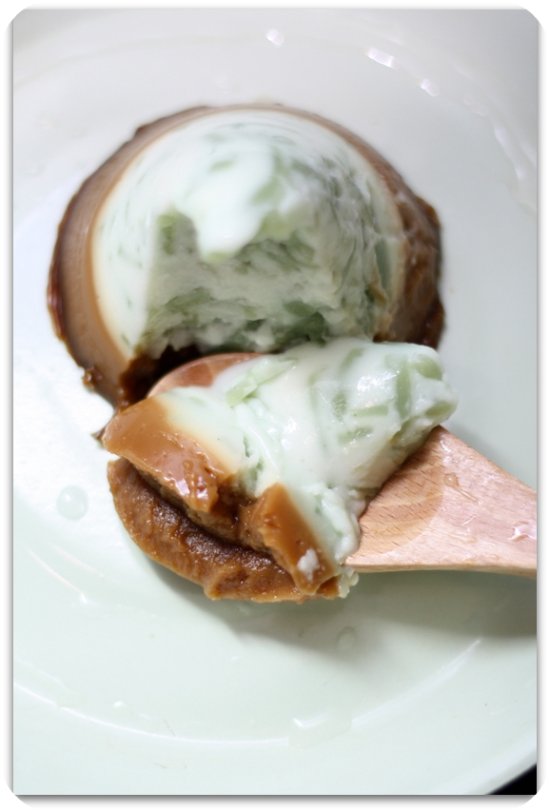
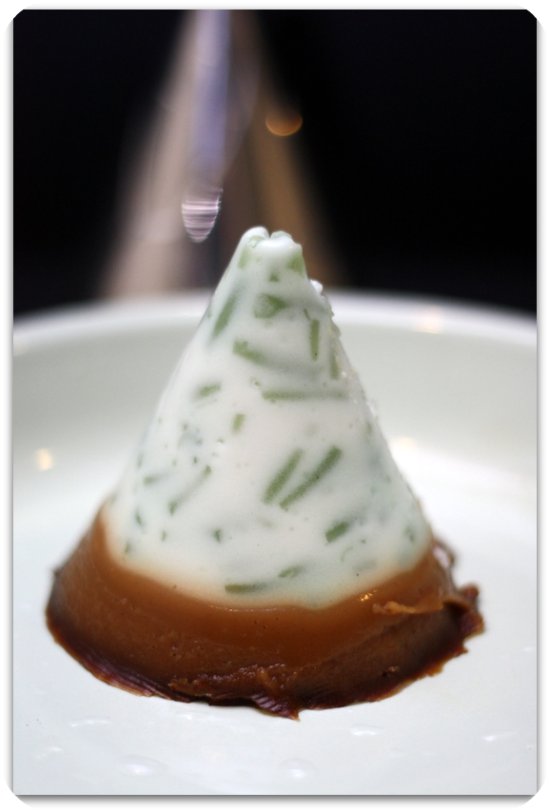
Get Your Jelly On! Day 10 - Cendol-lah! (Kuih Talam Cendol)

IMG_5334

Let us go local today...with a favourite dessert aka the Cendol-lah!


Essentially it is a steamed cake made from three types of flours: rice, green pea and tapioca.


It is flavoured with the holy trinity of Malaysian flavours: pandan, gula melaka or palm sugar and coconut milk.


IMG_5328


The recipe is from the great Nonya cook, Debbie Teoh's Nonya cookbook. It is jam packed with different Nonya kuih recipes that makes me salivate over everytime I flick through the pages.


IMG_5312 


It is a little tedious but the wobbly kuih you get in return is so worth it. 


Needless to say, it is utterly delicious that we both polished it as quickly as we can once the photo shooting session was over.


Kuih Talam Cendol (Makes 2 moulds)


cendol layer (top)
3/4 tablespoons tapioca flour
1 tablespoon rice flour
1/2 tablespoon green pea flour
75ml thick coconut milk
100ml water
1 tablespoon sugar
1/4 teaspoon salt
100g cendol, drained


gula melaka layer (bottom)
75g palm sugar
225ml water
1 pandan leaf
30g rice flour
12.5g green pea flour
3/4 tablespoon tapioca flour
50ml thick coconut milk
1/8 teaspoon alkaline water


To prepare top layer: Combine tapioca flour, rice flour, green pea flour, coconut milk and water together in a bowl until there are no lumps. Sieve mixture into a clean pot. Add sugar and salt. Cook over low heat until mixture thickens in about 5 minutes. Add cendol; mix. Pour mixture into the mould. Steam for 15 minutes. Remove.


To prepare bottom layer: Boil the palm sugar, water and pandan leaf until it melts. Leave to cool. Sieve to remove any impurirties. Add remaining ingredients and cook over a low fire until it thickens. Pour into the mould. Steam for 15 minutes. Remove. Cool for 5 hours. Refrigerate if eating later or else just serve straightaway.


To serve: Remove moulds and use a knife to loosen. Turn on top of a plate and serve immediately.


Reminder: Support the cause by buying a Royal Selangor Nick Munro pewter mould as all proceeds go to breast cancer welfare association. Also, do remember to submit your suggestions to booliciouskl@gmail.com or leave a comment for the mould to win the Olympus camera VG-110. For more pictures, see the Flickr set for all the whole Royal Selangor Jellyriffic challenge. To view, all the jellies, see this link to the Royal Selangor website

Sunday, October 09, 2011

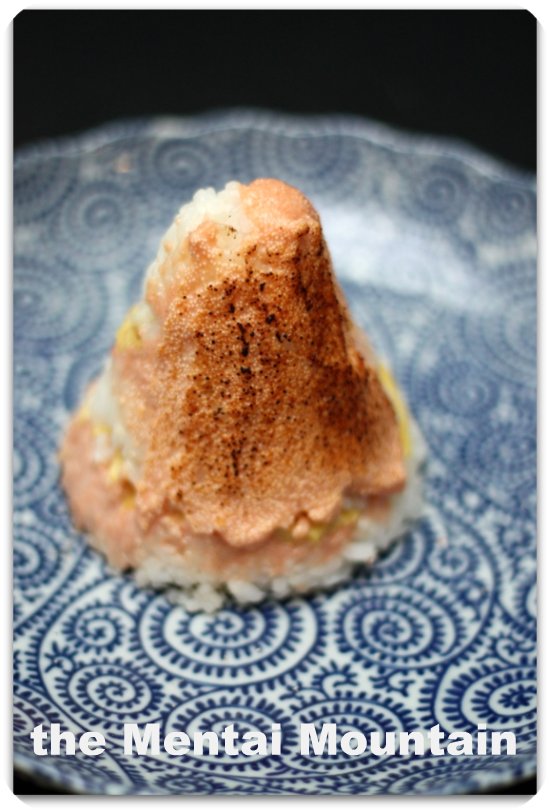
Get Your Jelly On! Day 9 - The Mentai Mountain (Mentai Sushi)

IMG_5309

Inspiration for this 30-day challenge comes from all directions.


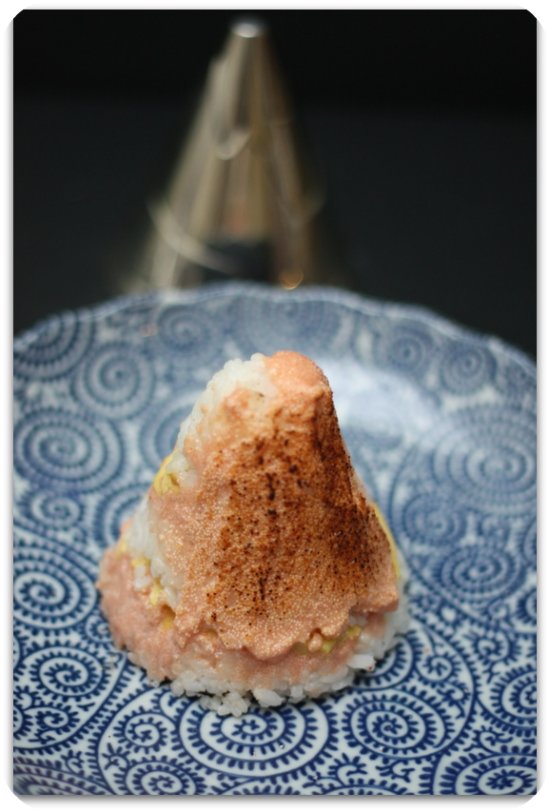
One of the wackiest ideas was based on an all-time favourite food item, the yummy-licious Mentai Sushi from Fukuharu, Terrace at Hock Choon in Ampang, Kuala Lumpur.


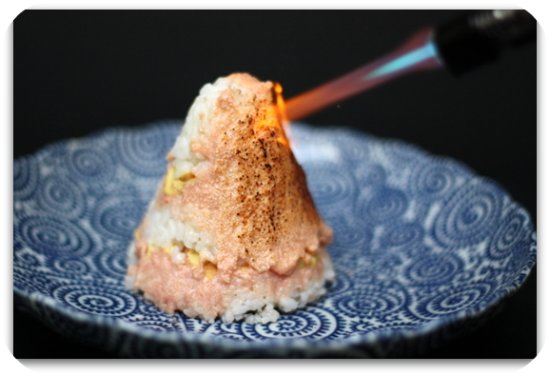
The decadent luscious bite is basically a tamago (egg omelette) sushi laden with mentai (cod roe) mayonnaise that is blow torched to give it an enticing toasty taste. Believe me, one is never enough.


  IMG_5305


I had two ways to recreate the Mentai Mountain - the quick and easy one or the super long and virtuous way. While I would have loved to say I made it from scratch (*hangs head in shame*), I do confess I went for the short cut i.e. just buy ready made ingredients and assemble them.


IMG_5311


Even though it was the cheat's way, this was super darn delicious that you won't notice.


In fact, after one mouthful of this mountain, you definitely want more.


For those lazy ones who have never yielded a blow torch before, I do suggest you just visit Fukuharu to get your mentai sushi fix. Once you have eaten this, there's no turning back. Believe me.


The Mentai Mountain (Makes one cone)


Sushi rice
Tamago (egg omelette)
Kewpie mayonnaise
Mentai (can be purchased from Jusco or Isetan or any Japanese supermarket)


Line the Royal Selangor mould with cling film.


Press a little sushi rice (about 1-2 teaspoons) in to form the cone portion. Layer with tamago. Mix the mentai with the mayonnaise to form the mentai mayonnaise. Top tamago layer with the 1-2 teaspoons of mentai mayonnaise. Top with more sushi rice. Layer with tamago and mentai mayonnaise. Finish with sushi rice to form a cone. 


Turn the mould onto a plate. Remove mould and cling film to get a cone of rice. Spread a little mentai mayonnaise on the cone. Blow torch to get a toasted effect. 


Eat with caution since one is never enough.


* We recommend you be generous with the amount of mentai mixed in the mayonnaise to get maximum pleasure. 


Reminder: Support the cause by buying a Royal Selangor Nick Munro pewter mould as all proceeds go to breast cancer welfare association. Also, do remember to submit your suggestions to booliciouskl@gmail.com or leave a comment for the mould to win the Olympus camera VG-110. For more pictures, see the Flickr set for all the whole Royal Selangor Jellyriffic challenge. To view, all the jellies, see this link to the Royal Selangor website


Saturday, October 08, 2011

Get Your Jelly On! Day 8 - Cherry Ripe (Cherry Jelly with Coconut Praline)

IMG_5249

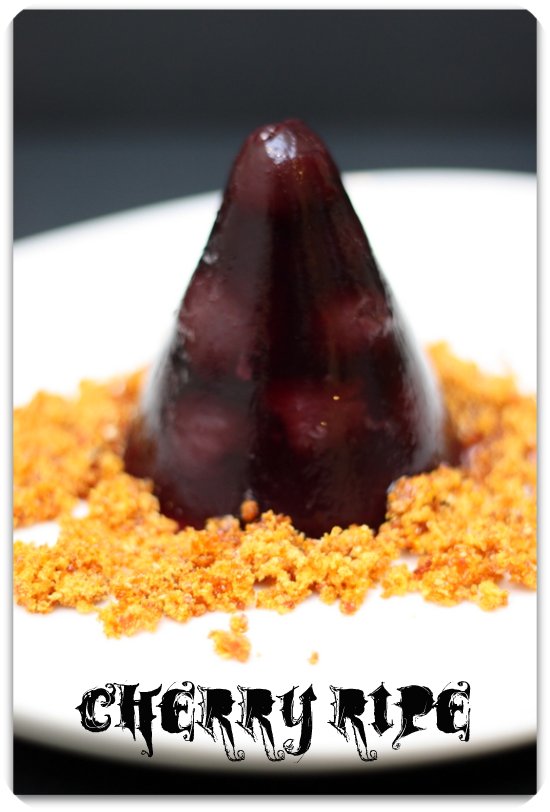
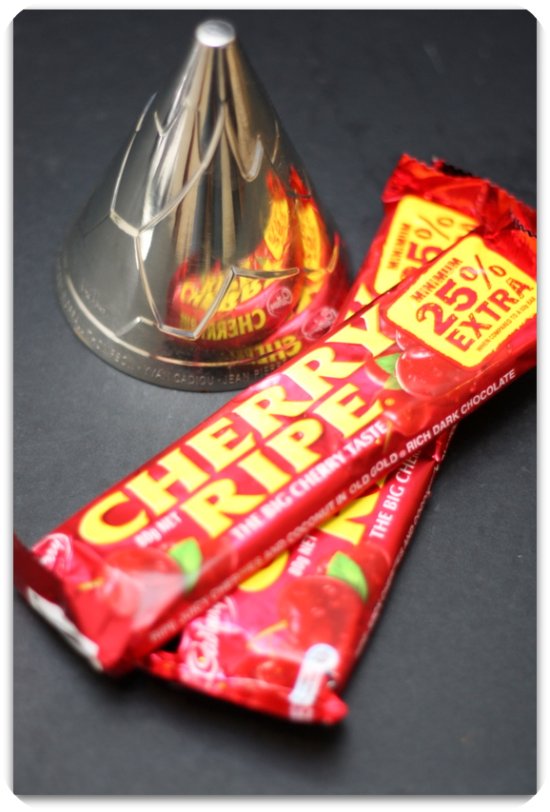
Sometimes things seem to work better on paper. The idea was simple. Take a favourite chocolate bar and recreate it jelly style. I decided on Cherry Ripe, a big favourite from Australia.


 IMG_5264


Getting the cherries set in jelly was easy. I decided to keep the coconut component in a praline form on the side to keep its crunch. The hard part was setting it in chocolate. I had experimented it with the other jellies and it worked fine but when it came to the final one, it was not meant to be I love working with Valrhona (that is all the fridge ever has) hence it was a bit too bitter for the sweet cherry jelly. Not only that my glaze was a little lumpy. In conclusion, we decided the cherry jelly was best just eaten with the coconut praline since the chocolate glaze was just too bitter to match it. 


Oh well, back to the drawing board. Incidentally, I just tested tomorrow's post and darn it all it works!!


IMG_5262


Cherry Ripe (Cherry Jelly, Coconut Praline and Chocolate)


440g can of dark cherries, drained and water reserved
300ml water
2 1/2 tablespoons gelatine powder


coconut praline
5 tablespoons dessicated coconut, toasted till golden brown
50g caster sugar


chocolate glaze


100g Valrhona dark chocolate
2 1/2 tablespoons water
1/2 tablespoon light corn syrup
3 tablespoons butter


To prepare cherry jelly: Mix the reserved cherry juices and water together. Place the gelatine powder with a little water to bloom. Bring to boil cherry juices and add gelatine powder; stirring to mix it together. Pour in mould. Add reserved cherries. Refrigerate until it sets.


To prepare praline: Melt sugar till it forms a caramel. Pour over a piece of foil slightly buttered. Sprinkle toasted coconut. Leave to set. Break praline into pieces and whizz in blender to make into crumbs. Set aside.


To prepare glaze: Melt all ingredients in a bain marie. Keep warm or else the glaze would set.


To assemble: Unmould jelly onto plate. Sprinkle coconut praline crumbs all over it. Pour over the chocolate glaze. Leave to set. Serve immediately.


Reminder: Support the cause by buying a Royal Selangor Nick Munro pewter mould as all proceeds go to breast cancer welfare association. Also, do remember to submit your suggestions to booliciouskl@gmail.com or leave a comment for the mould to win the Olympus camera VG-110. For more pictures, see the Flickr set for all the whole Royal Selangor Jellyriffic challenge. To view, all the jellies, see this link to the Royal Selangor website.

Friday, October 07, 2011

Get Your Jelly On! Day 7 - Flower Power (Roselle Ice and Jelly)

IMG_5204

Thank god it is Friday!


One week to this Jellyriffic challenge and I am exhausted.


Frankly, I'm looking forward to the weekend when I'll have time to rethink and work out the jellies.


IMG_5179


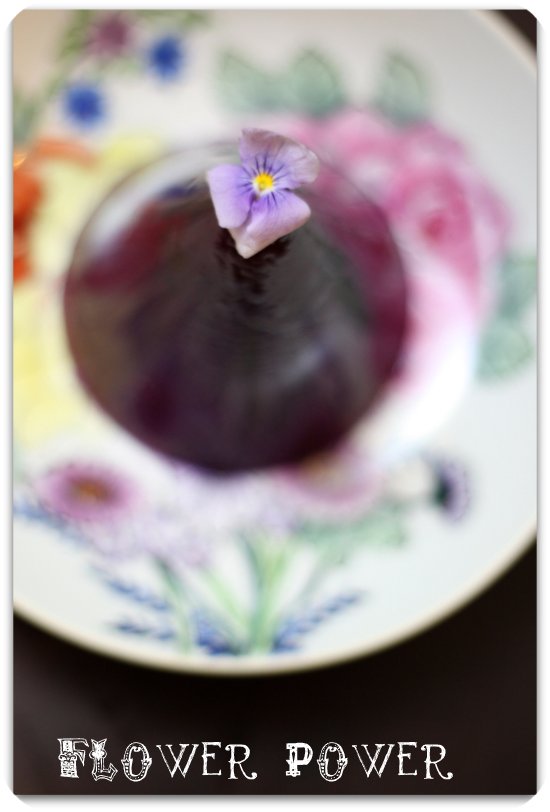
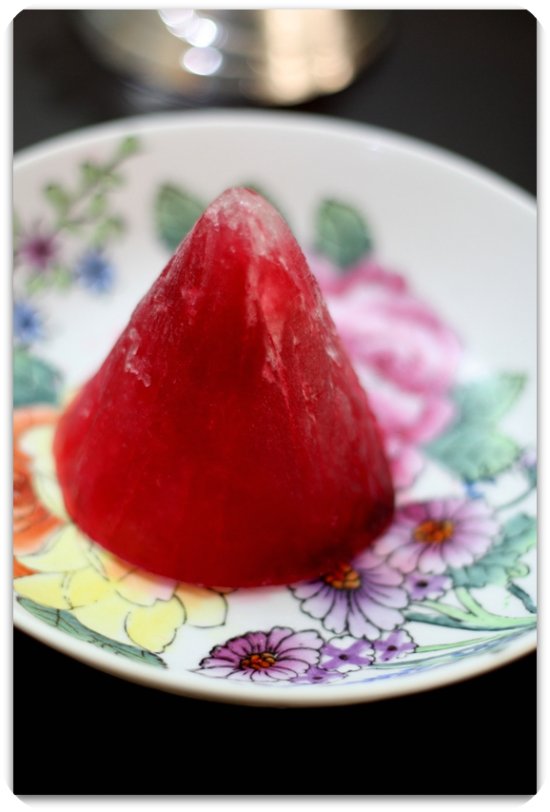
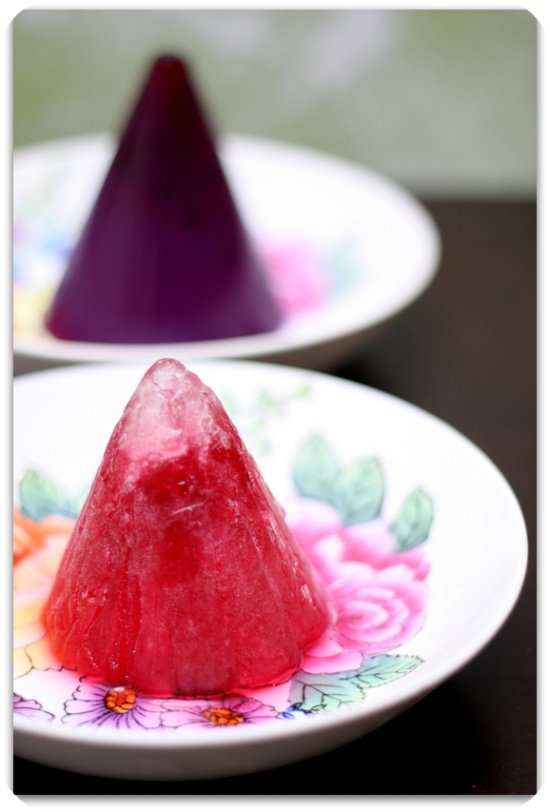
For today's post, I decided to work on a floral theme since I was using roselle or hibiscus. It's way much better than rose syrup since it is Vitamin C and gives you almost the same reddish colour.


The recipes ain't rocket science since I've not had time to experiment much in this past day but they're old favourites.


With the hot weather, I often keep a few tubes of what I call Ais Krim Malaysia - icy cold lollies made from favourite drinks. Usual ones in the freezer will be ribena lychee or roselle that are great to eat when you're enjoying a favourite movie. The Royal Selangor Nick Munro pewter jelly mould is perfect to create an icy cone that you can slowly savour.


I've also made a jelly one from agar agar powder. Hidden within it (not evident since it is so dark) are edible roselles. I've used a pretty good roselle juice concentrate that has no additional sugars so its quite pure. You can also boil your own roselle to create the juice. They also make great jams and pickles.


IMG_5184

Roselle Ice or Jelly (For 2 moulds)


50ml roselle juice concentrate
350ml water
2 1/2 teaspoons agar agar powder


Combine the ingredients. Pour into a mould lined with cling wrap. Unmould and serve straight away. If making jelly, just add agar agar powder to the mixture. Bring to boil mixture and pour into mould. Cool before refrigerating


Reminder: Support the cause by buying a Royal Selangor Nick Munro pewter mould as all proceeds go to breast cancer welfare association. Also, do remember to submit your suggestions to booliciouskl@gmail.com or leave a comment for the mould to win the Olympus camera VG-110. For more pictures, see the Flickr set for all the whole Royal Selangor Jellyriffic challenge. To view, all the jellies, see this link to the Royal Selangor website.
Related Posts Plugin for WordPress, Blogger...